- - -
- hours mins seconds
to get your checks by
Monday, Oct. 26th

 0
0 You have no items in your shopping cart.
Blog
Last updated: October 23, 2026
Guides to trust accounting explain the ledgers and the monthly reconciliation. Almost none of them tell you what has to be printed on the check itself, which is the part a compliance reviewer can see in seconds.
Quick Summary
Trust account checks are ordinary business checks held to stricter rules, because the money in the account belongs to someone else. State rules on safekeeping client property decide how the check must be titled, who signs it, what the memo line records, and how long the paper trail is kept.
- The check has to read as a trust check. Wisconsin's rule requires wording such as Trust Account or Client Account on the face, with the firm name and address and the account name in the upper left corner.
- An acronym on its own may not be enough. One rule states that an acronym without further elaboration does not clearly designate a client or trust account.
- Starter checks are ruled out. The same Wisconsin rule says starter checks are not acceptable for an IOLTA account, and a voided check gets reviewed to confirm the format.
- A lawyer signs every check. Minnesota's lawyer responsibility board requires at least one lawyer signature on every trust check, whatever the amount.
- The memo line is a record, not a courtesy. It has to identify the client matter and the reason for the disbursement.
- No cash, ever. Disbursement is by check to a named payee or an authorized transfer, not by a check payable to cash and not at an ATM.
The table below maps each recurring rule to the part of the check or stationery that has to carry it. Every row is explained further down.
| What the rules ask for | Where it lives on the check |
|---|---|
| The account is identifiable as a trust account | Printed account name line, spelled out, not an acronym |
| Every disbursement is traceable | Pre-printed sequential number, issued in order |
| The firm behind the account is named | Firm name and address in the upper left corner |
| Each payment names a client matter and a purpose | Memo line, plus a voucher stub where there is more to record |
| A lawyer authorizes the payment | Signature line, with a second line where the firm requires two |
| Trust and operating payments never get mixed up | A separate book, in a different color and style, stored apart |
What follows is background on how trust checks and their records work. It is not legal or accounting advice. Safekeeping rules sit in each state's own code of professional conduct, and those rules govern your firm, so put the detail past your state bar and your accountant before you approve any order.
Setting up a new account? Business checks can be printed to any of the specifications below, with production starting the day the proof is approved.
What this guide covers
- What is a trust account check?
- Can you write checks from a trust account?
- What has to be printed on a trust account check?
- Why does the memo line matter so much?
- Who has to sign a trust account check?
- What checks can be deposited into a trust account?
- How do you keep trust and operating checks apart?
- What records do the checks have to support?
- Do trust account checks expire?
- What should you specify when you order?
What is a trust account check?
A trust account check is a check drawn on an account that holds money belonging to someone other than the business writing the check. In a law firm that money is client money: settlement proceeds, advance fees that have not been earned yet, and funds held for court costs. The account is titled to show the funds are held in a fiduciary capacity, and the check inherits that title.
That single fact changes everything about the document. An ordinary business check only has to instruct the bank. A trust check has to prove, months later, whose money moved and why.
Is a trust account check the same as an escrow check?
In practice they are the same idea under different labels. Lawyers usually say trust account, title companies and property managers usually say escrow account, and both describe an account holding other people's money with the same duty to keep it separate and traceable. The wording printed on the check follows whichever term the governing rules use.
What does IOLTA mean on a trust account?
IOLTA stands for Interest on Lawyers Trust Accounts. It is the pooled account used for client funds that are too small or held too briefly to earn interest for the client, with the interest going to the state program instead. Funds large enough to earn for a single client go in a separate interest bearing account, which Minnesota's board says should be titled as a trust account for that named client.
The distinction matters when you order, because the two accounts need separate check stock with separate numbering.
Can you write checks from a trust account?
Yes, to a named payee. Trust rules allow money to leave the account by check made out to a person or a company, or by an authorized bank transfer. What they rule out is any route that removes the name of the recipient from the record.
- No checks payable to cash. New Mexico's trust account manual treats a check written to cash as evidence of commingling or worse.
- No counter or ATM withdrawals. New Mexico's manual also states a lawyer may not withdraw cash from the trust account at a bank counter or at an ATM.
- No paying firm bills from trust. Earned fees move to the operating account first, by check or transfer, and the firm pays its own creditors from there.
- No disbursing against uncleared funds. Deposited items have to clear before a check is written against them.
Can a trust account have a debit card?
Treat it as off limits. Guidance that bars cash withdrawals at a counter or an ATM leaves a card with nothing permitted to do, and a card creates a payment with no payee name, no signature and no memo line. Minnesota's board also states that a non-lawyer may not withdraw client funds at all, which a shared card would make impossible to control.
Can you write a trust check before the deposit clears?
No, and the usual workarounds are specifically rejected. Minnesota's board says a post-dated check or an instruction not to cash it yet is not an acceptable substitute for waiting for funds to clear. The same guidance notes local items generally take about three business days, while out of town items can take ten days or more.
Our guide to how long it takes for a check to clear covers what drives those timings on the banking side.
What has to be printed on a trust account check?
More than most firms realize. Wisconsin's supreme court rule on trust property, SCR 20:1.15, sets out the check format directly: trust account checks must be pre-printed and pre-numbered, must show the lawyer or firm name and address and the account name in the upper left corner, must include words such as Client Account or Trust Account, and must carry a memo line that identifies the client matter and the reason for the disbursement.
That same Wisconsin rule also closes the shortcut new firms reach for. It states that starter checks are not acceptable for an IOLTA account, and the regulator reviews a voided check from the printed stock to confirm the formatting is right.
Is writing IOLTA on the check enough?
Not everywhere, and this is where firms get caught. Wisconsin's rule says an acronym such as IOLTA, used without further elaboration, does not clearly designate a client or trust account. New Jersey's IOLTA program asks for the opposite treatment: it asks that the word IOLTA not appear on checks or deposit slips at all, and that the phrase Attorney Trust Account be used instead, preferably on the second line.
The practical answer is to spell it out. A printed line reading Attorney Trust Account or Client Trust Account satisfies the rule that wants elaboration and the program that wants the acronym left off. Check your own state's wording before you approve the proof, because this is a detail the printer cannot guess for you.
| Printed element | What the rules say | Safe approach when ordering |
|---|---|---|
| Account name | Must identify the account as a client or trust account; an acronym alone may not qualify | Print the phrase in full on its own line |
| Firm name and address | Required in the upper left corner alongside the account name | Use the firm's registered name, not a trading shorthand |
| Check number | Pre-printed and pre-numbered; canceled checks numbered consecutively | Start a distinct number range for each trust account |
| Memo line | Must identify the client matter and the reason for the payment | Choose a format with a full width memo line or a voucher stub |
| Signature lines | A lawyer must sign; some firms require a second signature | Order two lines if your written plan calls for two |
| Starter stock | Not acceptable on an IOLTA account | Order printed stock before the account receives client funds |
Security printing sits alongside those requirements rather than replacing them. Our guide to blank check security features explains what each feature does, and high security business checks covers the stock that carries them.
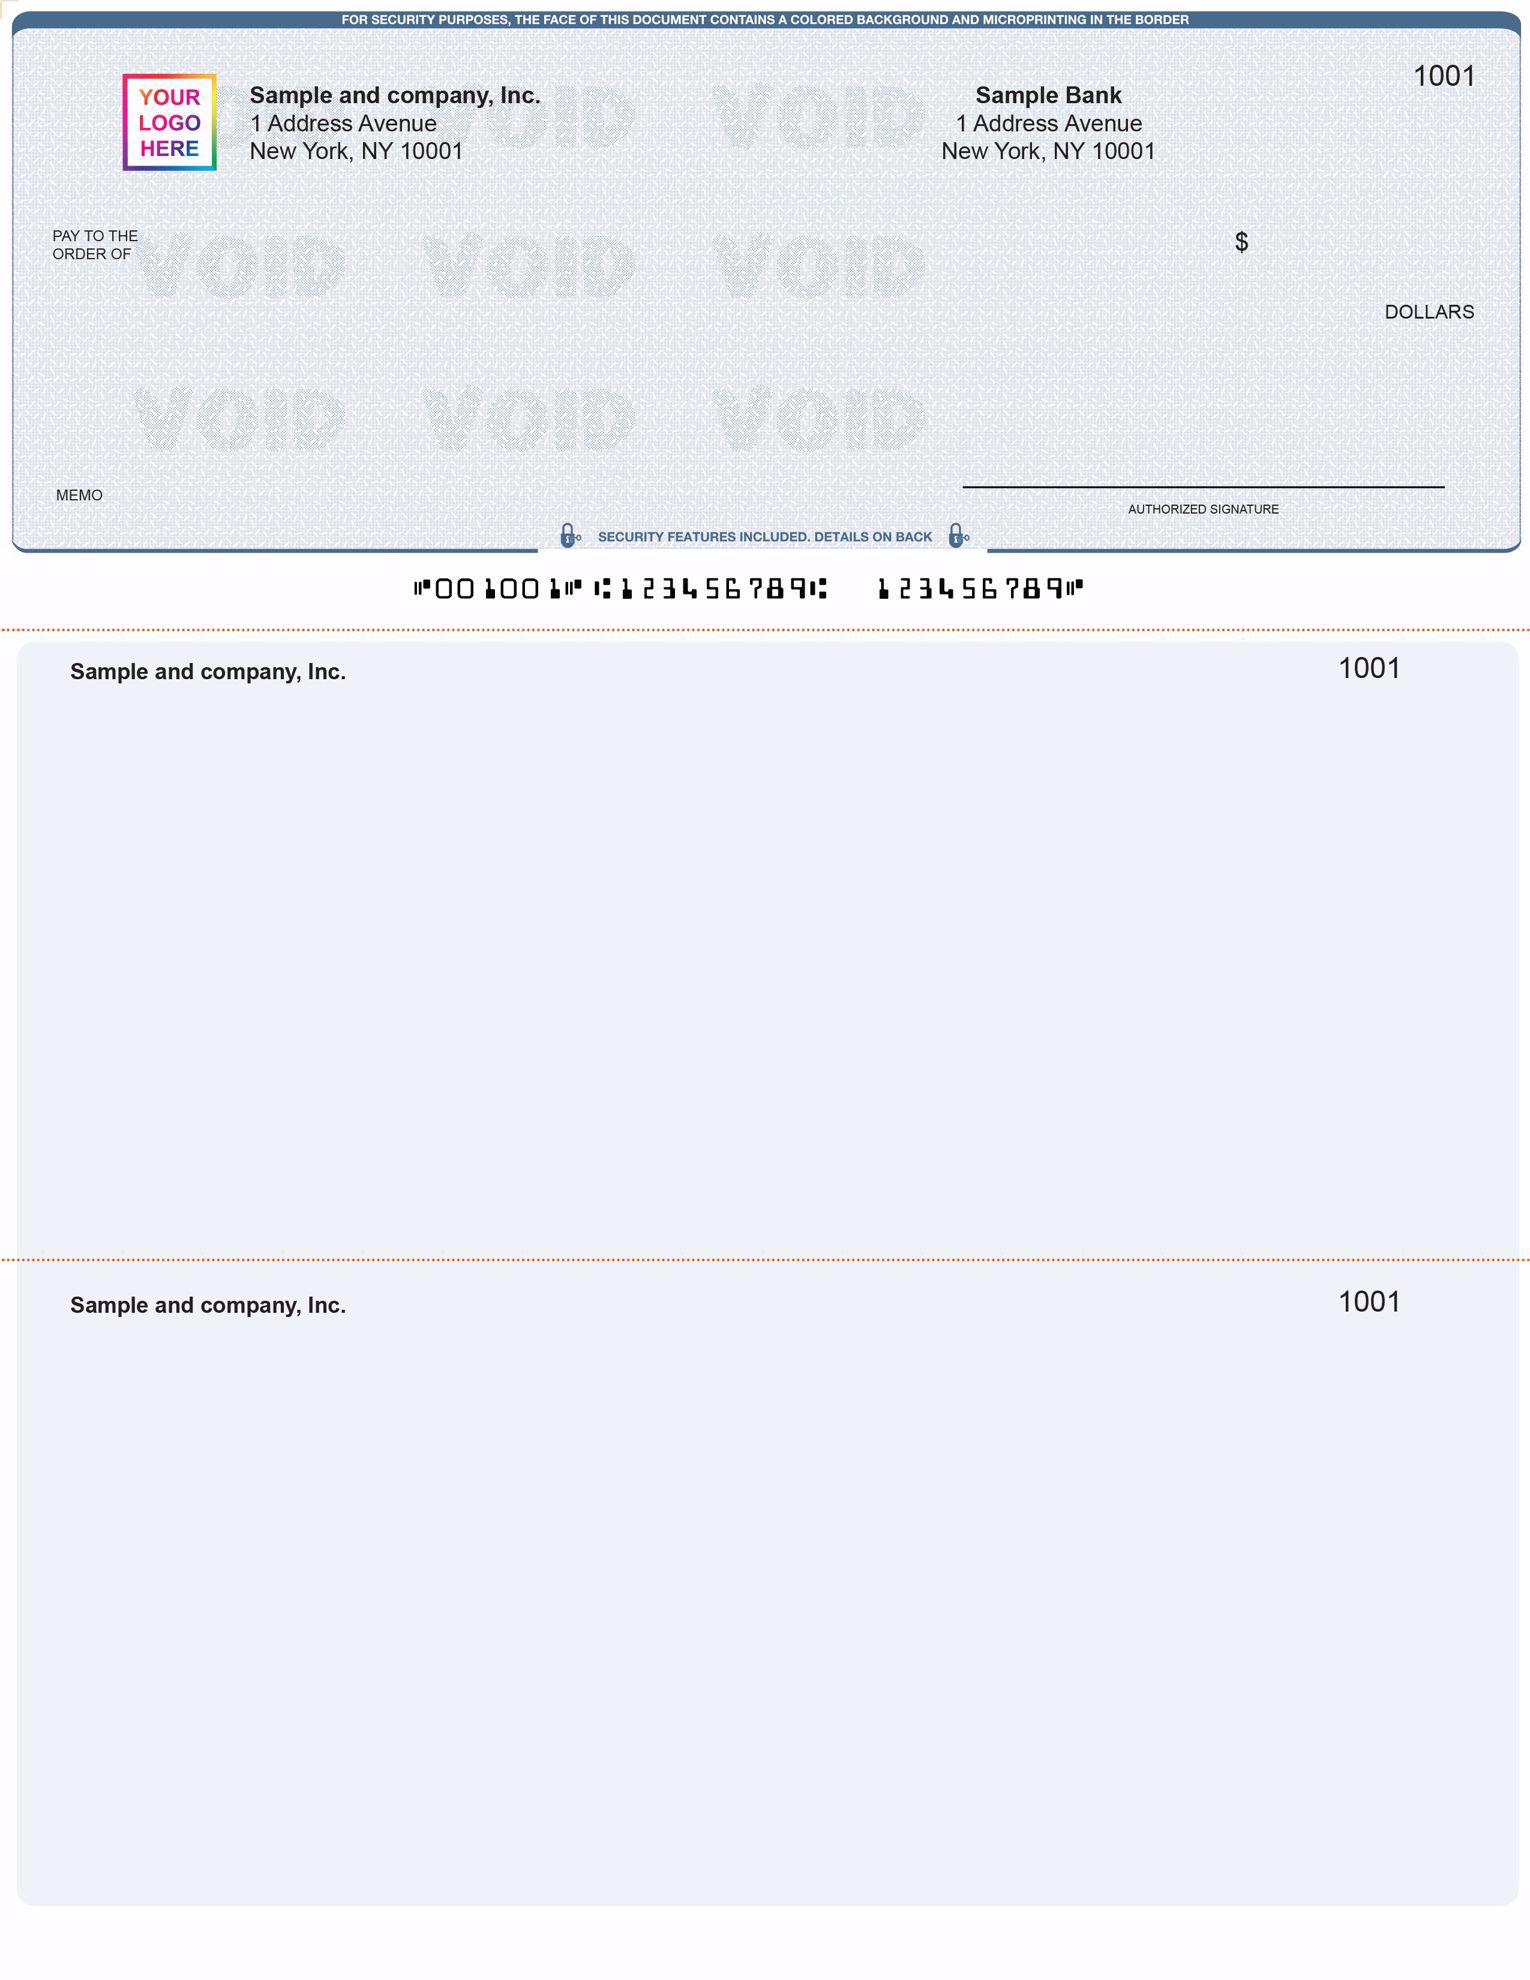
A voucher layout like this one puts the recorded detail next to the payment. See computer checks for the printed formats, or check position guide if you are matching stock to accounting software.
Why does the memo line matter so much?
Because on a trust check the memo line is part of the required record, not a note to yourself. Wisconsin's rule requires it to identify the client matter and the reason for the disbursement. Florida's rule, 5-1.2, requires the canceled check to identify the client or case by name or number in the memo area, and requires the disbursements journal to carry the reason for every entry.
Left blank, the check proves money moved and nothing else. A reviewer then has to take your word for whose money it was.
- Name the matter, not the person. A file number or matter name survives a client with several active files.
- Say what the payment was for. Filing fee, expert invoice, settlement distribution, refund of unearned fees.
- Use the stub when the memo line runs out. A voucher stub has room for the matter, the invoice reference and the approval.
- Never leave the stub blank. New Mexico's manual lists blank or incomplete check stubs as a warning sign of possible misconduct.
Who has to sign a trust account check?
A lawyer, on every check. Minnesota's board states that at least one lawyer must sign a trust account check regardless of the amount, and that a non-lawyer may serve as a second signatory only where the firm requires two signatures. The same guidance states a non-lawyer may not withdraw client funds from the account.
New Mexico goes further on who may be on the account at all. Its rule requires an attorney licensed in that state to be a signatory, and bars non-lawyers from being signatories, with the firm's written trust account plan naming everyone who has signing authority.
- Write the plan around roles. A plan built on job titles survives a change of managing partner.
- Keep the signer list short. Every extra signer is another person whose signature a reviewer has to match.
- Split assembling from authorizing. The person who pulls the invoice and fills the check is not the person whose signature releases it.
- Route the statement elsewhere. Give the unopened bank statement to someone who does not write trust checks.
Our guides to check signing policy and who signs a business check cover how to write that down and how the bank records who may draw on the account.
What checks can be deposited into a trust account?
Only money that belongs to someone else. Client funds go in: settlement checks, advance fees that have not been earned, and money held for court or filing costs. Firm money stays out, and New Mexico's manual lists an operating or personal account check written into the trust account as a warning sign.
When a single check mixes earned and unearned money, the whole item goes into trust first and the earned portion is moved out afterwards by a check or transfer payable to the firm. Paying the firm's share straight out of trust to a third party skips the step that creates the record.
What does the deposit side of the paper trail need?
Deposit records are part of the required file, not an afterthought. New Mexico's manual requires duplicate deposit slips to be kept for each trust account, and Florida's rule requires deposit slips plus a cash receipts record that identifies the date, the source and the client or matter.
Wisconsin's investigation findings bear this out in a mundane way. Using the wrong deposit slip, or failing to endorse a deposit item, is logged as a law office error rather than a bank error, so it lands on the firm.
- Order deposit slips with the same trust wording as the checks, so a slip cannot be used on the wrong account by accident.
- Use duplicate slips so the firm keeps a copy without anyone transcribing it.
- Endorse every item the same way, with a stamp rather than a hand written line.
- Record the source on the slip, because a bank statement line will not tell you later.
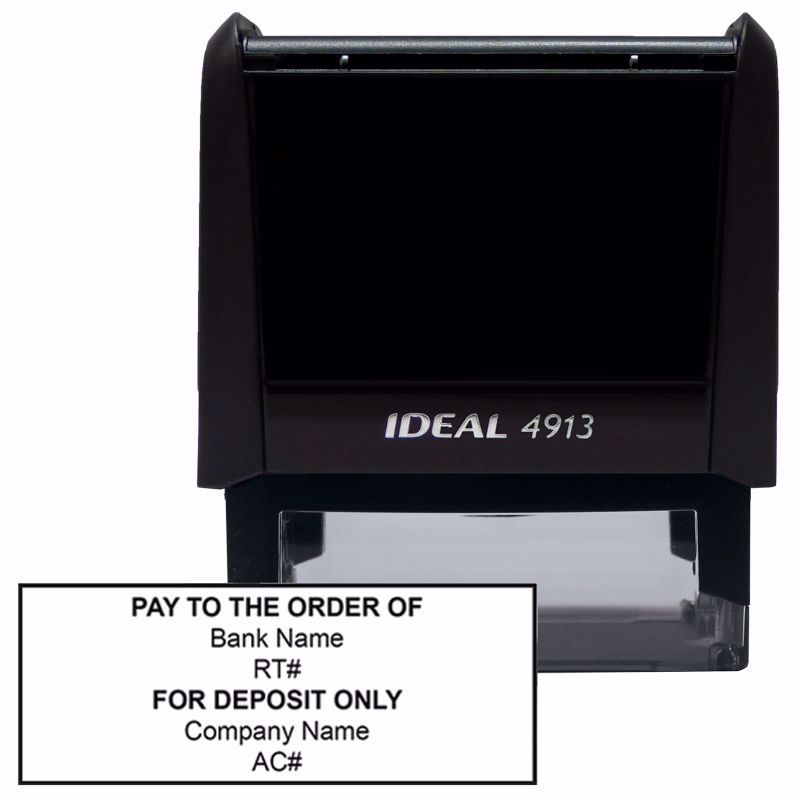
See endorsement stamp and deposit stamp for checks for the stamp options, how to endorse a check for the wording, and how to fill out a business deposit slip for the slip itself.
How do you keep trust and operating checks apart?
Make them impossible to confuse at arm's length. The cheapest control in trust accounting is visual: order the trust book in a different color and style from the operating book, and store the two checkbooks in different places in the office so nobody reaches for the wrong one in a hurry.
A single check written from the wrong book is not a clerical slip. It is either a firm payment made with client money or client money paid out with no trust record, and both are the findings that trigger a review.
- Different color and style for trust stock, so the mistake is visible before the check is signed.
- Separate number ranges for each account, logged when the stock arrives.
- Separate storage, locked, with one named custodian and a deputy.
- Separate deposit slips and stamps, so the deposit side cannot cross over either.
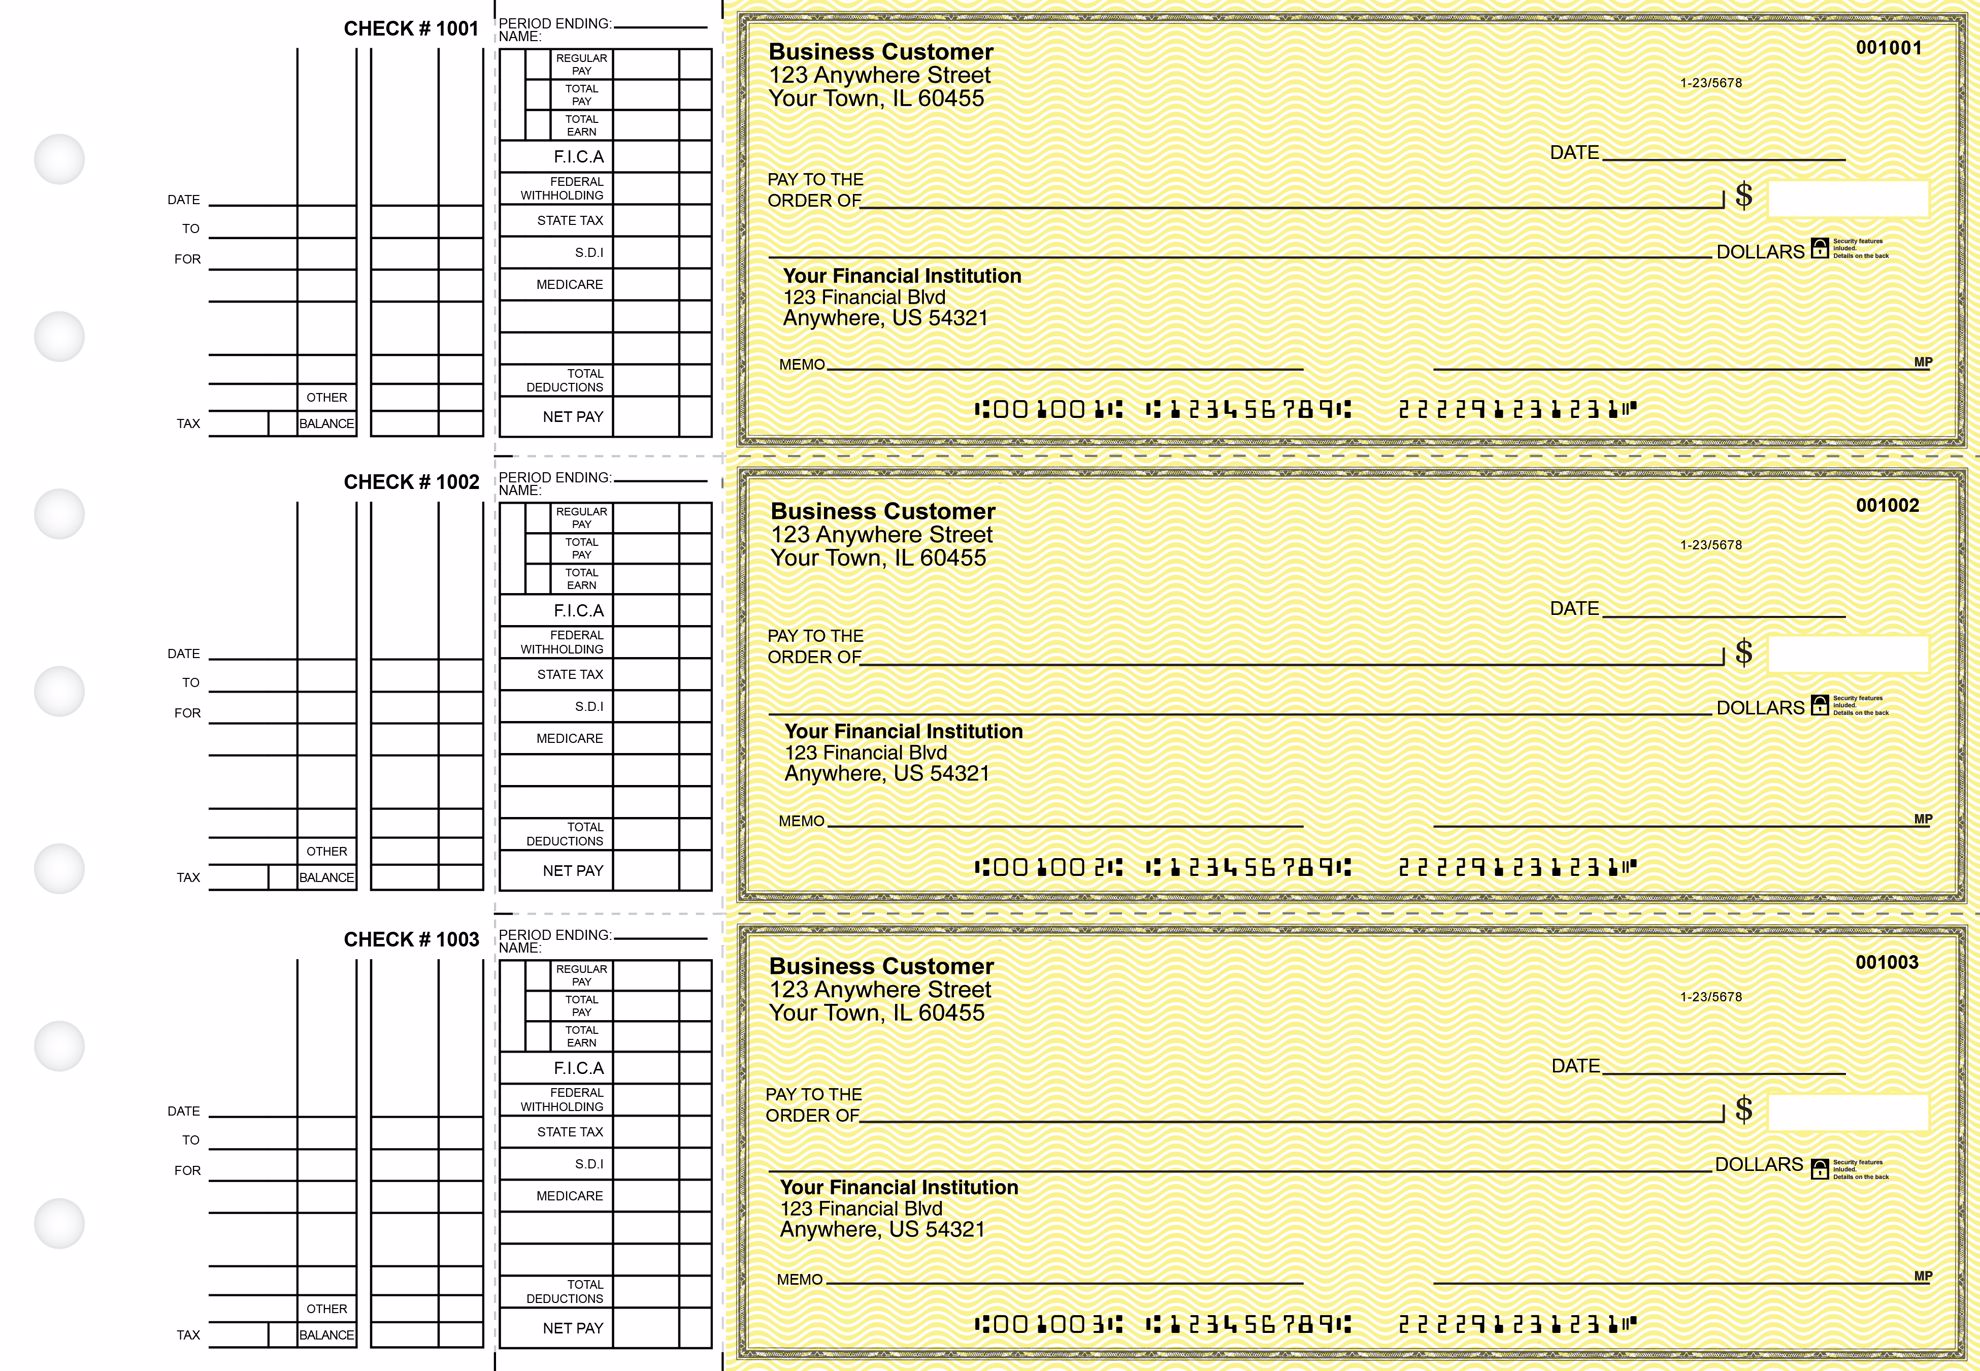
Firms that write trust checks by hand usually want a bound book with a duplicate record. See manual business checks for those formats, or multi purpose business checks if some are hand written and the rest are printed.
What records do the checks have to support?
The check is one piece of a file that has to balance three ways. Trust rules ask for a running record of money in and out, a separate ledger for every client, and a monthly reconciliation that ties both to the bank. The check, the stub and the deposit slip are what make those entries provable.
- A receipts and disbursements journal with the date, the client or matter, the check number and the reason for each entry.
- A separate ledger per client or matter showing receipts, disbursements and the unexpended balance.
- Bank statements and canceled check copies for every trust account.
- Duplicate deposit slips and the checkbook or stubs themselves.
- A written monthly reconciliation, kept rather than discarded once it balances.
What is a three way reconciliation?
A three way reconciliation compares three figures that must agree: the bank balance, the firm's own trust ledger or checkbook balance, and the total of all individual client ledger balances. New Mexico's rule requires a written reconciliation of those three at least monthly. Florida's rule requires a monthly reconciliation of the bank balance against the checkbook and journal, listing deposits in transit and outstanding checks by date and number, then a monthly comparison of that reconciled total against the total of the client ledgers.
Listing outstanding checks by number is where the printed sequence earns its place. A check number that cannot be accounted for is the one thing a reconciliation cannot explain away.
How long must trust account records be kept?
Longer than most firms expect, and the period varies by state. New Mexico requires records to be kept for five years after the representation ends, and to be produced within ten days of a request. Florida requires reconciliations and listings to be kept for at least six years, and trust records for six years after the final conclusion of each representation.
A check register is the running list that turns a drawer of printed stock into a sequence you can defend.
Does an annual filing apply as well?
In some states, yes. California requires attorneys each year to register every client trust account that was open during the reporting period, complete a self assessment and certify compliance with the safekeeping rules. Florida's rule requires a detailed annual listing of the unexpended balance held for each client or matter.
Do trust account checks expire?
Six months is the line the banking code draws. Past that date the bank may turn the item away, and it may equally honor it in good faith and charge the account, so neither result is something a firm can plan around. Certified checks sit outside the rule, because the bank that certified the item is the one on the hook.
Bar guidance is often stricter than the banking rule. Minnesota's board treats a trust check as potentially stale after about 90 days and asks the firm to investigate uncashed checks, then reissue or write to the client rather than leave the item outstanding.
- Review outstanding checks every month as part of the reconciliation, not once a year.
- Contact the payee before the item goes stale, while the address you hold is still current.
- Void and reissue rather than re-date. A re-dated check breaks the link to the original entry.
- Keep the void, marked and filed in number order, so the sequence stays complete.
See how long a business check is good for for the banking side, and what is a voided check for handling the void itself.
What should you specify when you order trust account checks?
Decide these eight things before you approve a proof. Each one maps to a rule above, and each one is far harder to fix after the stock is printed and the numbering has started.
| Decision | What to confirm before printing |
|---|---|
| Account wording | The exact phrase your state expects, spelled out rather than abbreviated |
| Firm block | Registered firm name and address, positioned upper left with the account name |
| Starting number | A range that does not overlap the operating account or any earlier trust stock |
| Format | Voucher stub for software printing, or a bound book with duplicates for hand writing |
| Signature lines | One or two, matching the written trust account plan |
| Color and style | Visibly different from the operating stock already in the office |
| Deposit slips and stamp | Duplicate slips carrying the same trust wording, plus an endorsement stamp |
| Timing | Printed stock in hand before the account receives client money |
You do not have to order trust stock through the bank that holds the account. Our guide to ordering checks outside your bank explains what the printer needs instead, and ordering business checks for the first time walks through a first order end to end.
Related reading
- Types of business checks sets the voucher layouts named above beside every other format.
- Business checks vs personal checks covers why a firm account needs printed business stock.
- Check signing policy covers the written document your firm adopts.
- Check register shows how to log each issued number so a gap is obvious.
What to do next
Start by reading your own state's safekeeping rule for the exact account wording, then pull a blank check from your current trust book and compare it line by line against the table above. Most firms find one or two gaps, usually the memo line or the account name.
Then bring the stock up to the rule. The account wording, the starting number and the number of signature lines are all specified by you on a business checks order, and high security business checks put tamper resistant stock under the same imprint. Production runs the same day, with delivery the next.
About the Author
Checks Next Day is a U.S. check printer whose daily work includes trust and escrow stock for law firms, title companies and property managers. Three imprint questions reach us at proof stage more than any others: how to word the account line, where to start the numbering, and whether one signature line is enough.
This guide was built around those three questions and checked against published state rules on safekeeping client property. Those rules are written state by state, so treat your own bar's wording as the one that counts.
Last updated: October 22, 2026
Every guide to nonprofit disbursement controls stops at policy. None of them mention that the check itself has to carry something for those controls to hold up when a reviewer tests them, which is the gap this page fills.
Quick Summary
Business checks for nonprofits and churches are ordinary business checks used under tighter controls. What changes is not the paper, it is the requirement that every payment be traceable, approved before it was prepared, and reviewed by someone who did not prepare it.
- Pre-numbered checks are the baseline. Federal guidance for grant funded programs puts every disbursement other than petty cash onto a pre-numbered check.
- Two signature lines make the expectation visible. Two signatures is described as a basic internal control, usually applied above a threshold your board sets.
- The bookkeeper should not be the only signer. The control exists to stop one person holding sole authority to write checks.
- Never pre-sign. Guidance on disbursement controls says checks should not be pre-signed, and that written policy should prohibit it.
- Voided checks stay in the file, they do not go in the trash. Mark the check void, cut out or black out the signature line so it cannot be reused, then file it with the voucher it belongs to.
- The stub is where fund coding belongs. A voucher stub survives into the audit file. A memo line is a label.
The table below maps the controls the sector expects to the feature the check has to carry. Each row is explained further down.
| Control the sector expects | What the check has to carry |
|---|---|
| Every disbursement traceable | A printed sequential number, issued and logged in order |
| Second review of significant payments | Two signature lines printed on the face |
| Approval recorded before preparation | A voucher stub with room for the approval reference |
| Restricted funds tracked | Stub space for fund name and budget line |
| Independent reconciliation | A register or duplicate record the reviewer can hold |
| Blank stock access limited | Secured stock, stored locked, with the number range logged |
This page is general information about check handling and disbursement controls, not legal, accounting or tax advice. Your own bylaws, funder agreements and auditor requirements govern, so confirm specifics with your accountant and your board.
If you are setting a new account up, business checks come in every format described here and are produced the same day.
What this guide covers
- What makes nonprofit check handling different?
- Which controls do auditors and funders expect?
- Which check features support each control?
- Which check format should you order?
- How should a church handle checks with volunteer help?
- How should a nonprofit handle payroll checks?
- How do you record a restricted fund on a check?
- What should you do with voided checks?
- How do you keep blank check stock secure?
What makes nonprofit check handling different?
The money belongs to a mission rather than an owner, so someone outside the organization eventually tests how it was spent. A small company can run on trust and survive. A nonprofit is answerable to a board, often to funders, and sometimes to an auditor who will sample payments and ask to see the trail.
That changes what a check has to do. It is no longer just an instruction to the bank. It is a record.
Who actually signs the checks?
Someone other than the person who keeps the books, and not that person acting alone. The sector guidance is consistent on the underlying principle: the point of the control is to stop one person holding sole authority to write checks.
- Name roles, not only people. A policy written around job titles survives a change of treasurer.
- Keep signers to the minimum practical. Disbursement guidance asks for exactly that, with signing kept to people senior enough to carry it.
- Separate preparation from signing. Whoever prepares the payment should not be the person who authorizes it.
- Put the bank statement in different hands. A second person besides the bookkeeper should see statements.
Our guide to who signs a business check covers how signing authority is set up at the bank, which is a separate question from who your policy allows.
Why is segregation of duties harder in a small nonprofit?
Because the model assumes four pairs of hands and many organizations have one. Disbursement guidance defines segregation as never letting a single person carry one transaction the whole way through, splitting the authorizing, the signing, the recording and the reconciling between different people.
The same guidance offers the workable compromise for a single staff organization: the staff member signs, while a board officer such as the treasurer looks over disbursements, statements and canceled checks every month.
That is the pattern worth copying. When you cannot split the doing, split the reviewing.
Which controls do auditors and funders expect?
A short list comes up repeatedly across nonprofit governance guidance and federal grant guidance. None of it is exotic, and most of it costs nothing beyond the discipline to follow it.
- Written authorization rules. Who may approve a payment, and what counts as significant enough to need more approval.
- Documentation for every disbursement. An invoice or receipt plus a disbursement voucher, not a note from memory.
- A pre-numbered check for every disbursement apart from petty cash.
- Independent reconciliation. Done by someone outside the authorization and signing functions.
- No checks payable to cash, and no pre-signing. Both stated as policy level prohibitions.
- Limited access to blank checks. Who can reach the stock is treated as a control in its own right.
- Periodic vendor list review by someone objective, to catch payees nobody can explain.
Why must disbursements use pre-numbered checks?
Because the number is what makes a payment provable. Federal guidance for grant funded programs requires a pre-numbered check for every disbursement apart from petty cash, and the reason is simple: an unbroken sequence lets a reviewer demonstrate that nothing was issued outside the records.
A gap in that sequence is not a small untidiness. It is a question you have to answer, and the honest answers are narrow: it was voided and filed, it was spoiled in the printer, or it is unaccounted for.
- Record the number range when stock arrives. This takes seconds and makes every later check possible.
- Issue in order. Skipping around destroys the one property the sequence gives you.
- Reconcile the sequence, not just the balance. A missing number shows up nowhere else.
A check register is where that sequence lives between the stock cupboard and the bank statement.
What should your check policy prohibit outright?
Short rules that need no judgment are the ones that hold under pressure. Guidance on disbursement controls names two specifically, and practice adds the rest.
- Never draw a check payable to cash. It removes the payee, and the payee is the record.
- Never pre-sign. A signed blank is a negotiable instrument with no review attached to it.
- Never sign without the supporting document. Signing on trust works until it does not.
- Never leave signed checks unattended between signing and sending.
- Never let the preparer also post the entry and reconcile. That is the whole loop in one pair of hands.
Our guide to a written check signing policy covers how to put these in a document your board can adopt.
Which check features support each control?
This is the half the sector guidance leaves out. A control written in a policy still has to be executable on the day, and several of them depend on what is printed on the document in front of the signer.
| Feature | Control it makes possible | What happens without it |
|---|---|---|
| Printed sequential number | Traceability and gap detection | No way to prove nothing was issued off book |
| Two signature lines | Second review above your threshold | The rule lives only in a policy nobody sees at signing |
| Voucher stub | Approval reference and fund coding travel with the payment | Coding is reconstructed later from memory |
| Duplicate or carbon record | An immediate record where checks are handwritten | The only record is whatever the writer remembered to note |
| Security stock | Alteration and copying become visible | A changed check looks exactly like a clean one |
| Organization name printed | No commingling with a personal account | Payments cannot be told apart at a glance |
The security side is explained feature by feature in our guide to blank check security features, and the formats that carry them are covered under high security business checks.
Which check format should you order?
Pick the format by how your checks get written, not by size of budget. The two things that decide it are whether payments come out of accounting software and whether a volunteer might be the one holding the pen.
| Your situation | Format that fits | Why |
|---|---|---|
| Payments run from accounting software | Check on top with a voucher stub | The stub prints the coding, so the record is made at the same moment as the payment |
| Checks written by hand in the office | Manual book with a duplicate record | A copy exists without anyone remembering to write one |
| Mixed, software plus occasional hand written | Multi purpose format | One stock covers both habits without a second order |
| Separate payroll run | Payroll format on its own sequence | Keeps pay detail off the accounts payable record |
| High volume, low detail | Three per page | Volume without a voucher, so coding has to live in the register |
When does a voucher check earn its place?
Whenever a payment has to be explained to somebody later, which in a nonprofit is most of them. The voucher stub carries the invoice reference, the fund and the approval alongside the amount, so the explanation is attached rather than reconstructed.
That is also the format most accounting software expects, which matters because the layout your software prints to has to match the stock you bought.
Our computer checks range covers all four positions, and types of business checks explains what each layout is for.
When is a manual check book the better fit?
When checks get written by whoever is in the building. A manual book keeps the stock, the writing surface and the record in one object, which is far harder to lose track of than loose sheets and a spreadsheet.
It also removes a failure mode that catches small organizations: nobody has to remember to open the accounting file before writing a check.
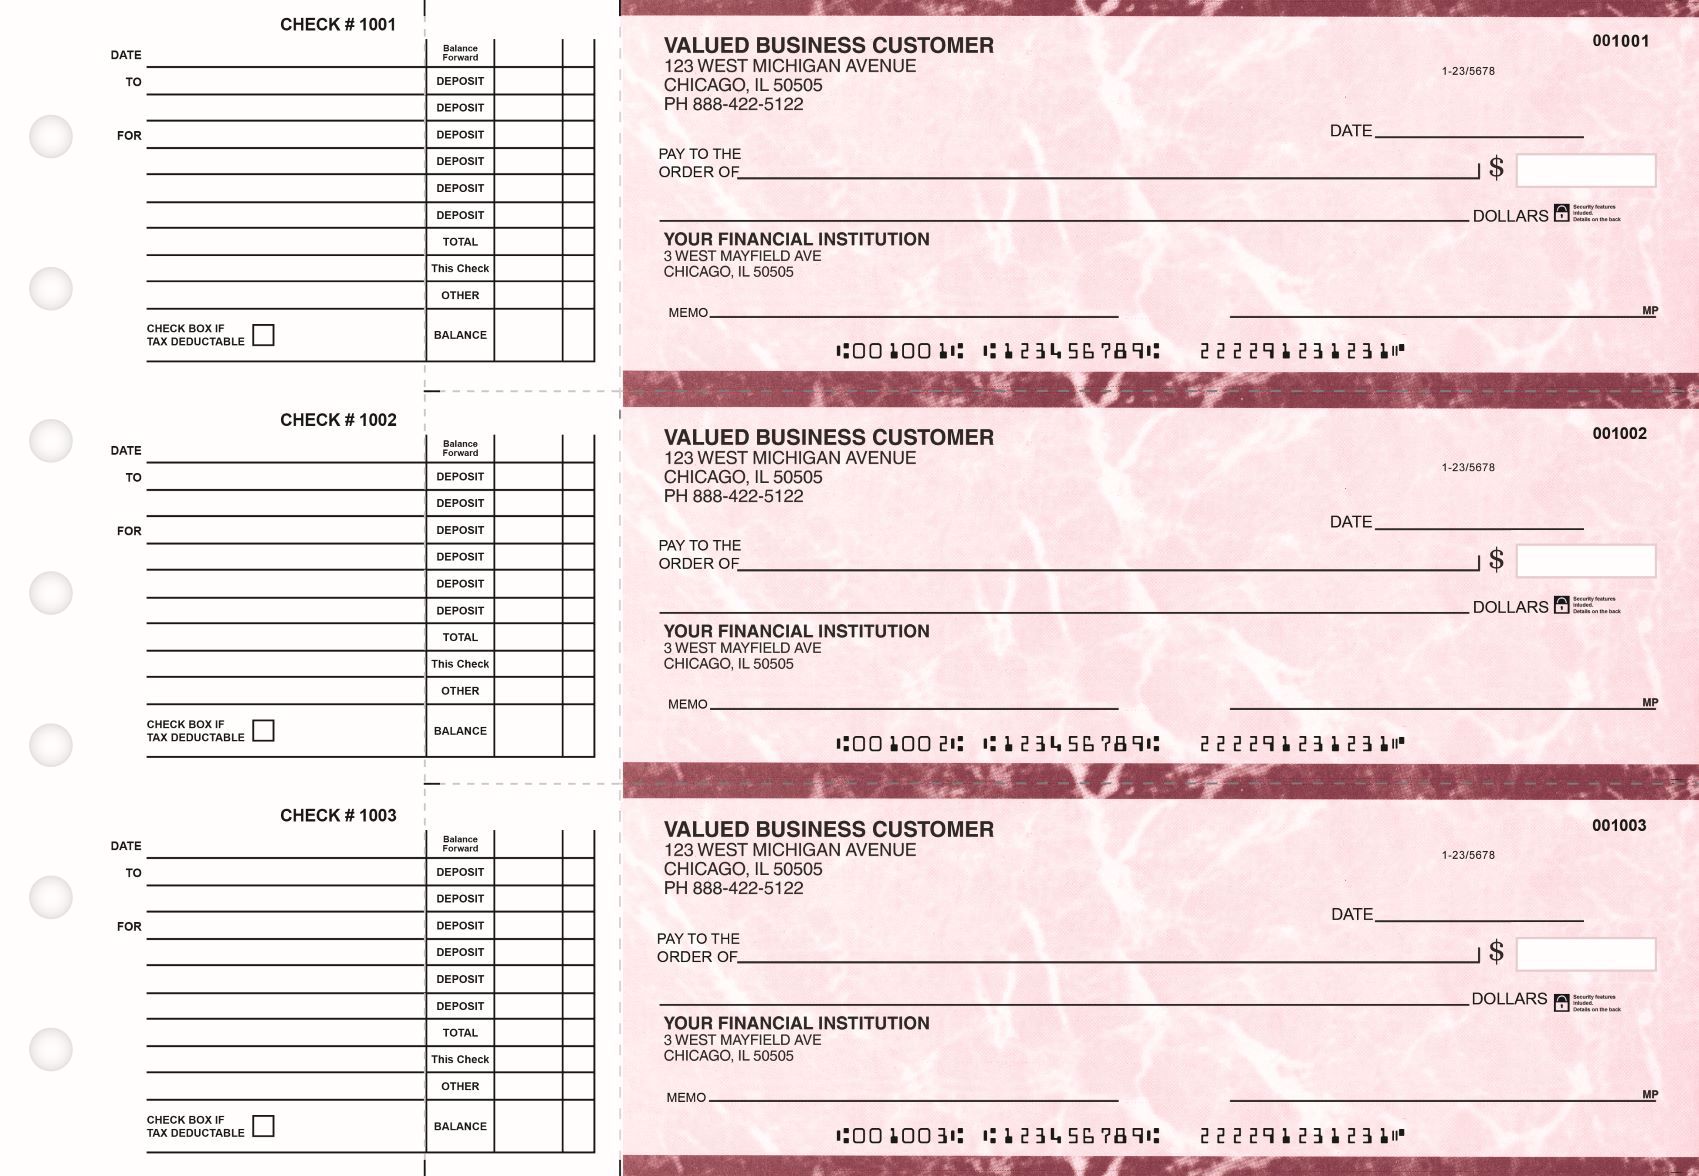
See manual business checks for the formats, or multi purpose business checks if you write some by hand and print the rest.
How should a church handle checks with volunteer help?
Let volunteers take part, but never let one person carry a payment from approval to reconciliation. Volunteer involvement is not the risk. A single unreviewed pair of hands is the risk, paid or not.
- Split preparation from signing. A volunteer can prepare while a named officer signs.
- Give the statement to a third person. Guidance is explicit that someone besides the bookkeeper should see it.
- Separate receiving from depositing. The person logging incoming checks should not be the person banking them.
- Rotate, and record the rotation. A rota is only a control if you can show who held what and when.
- Keep stock locked, not shared. Access to blank checks is itself a control.
One habit does more than all of these. Have whoever opens the bank statement be the person who does not prepare payments, and the rest of the structure matters less.
How should a nonprofit handle payroll checks?
Run payroll on its own stock and its own sequence. Guidance on nonprofit controls is specific that the person who prepares the payroll should not also distribute or hold custody of the payroll checks.
A separate sequence makes that split visible. When payroll and accounts payable share a number range, a reviewer cannot tell at a glance which process a given check came out of.
- Keep pay detail off the accounts payable stub. Different readers, different confidentiality.
- Fund the account before the run. Payday has no slack built into it.
- Do not let the preparer hand them out. That is the named control.
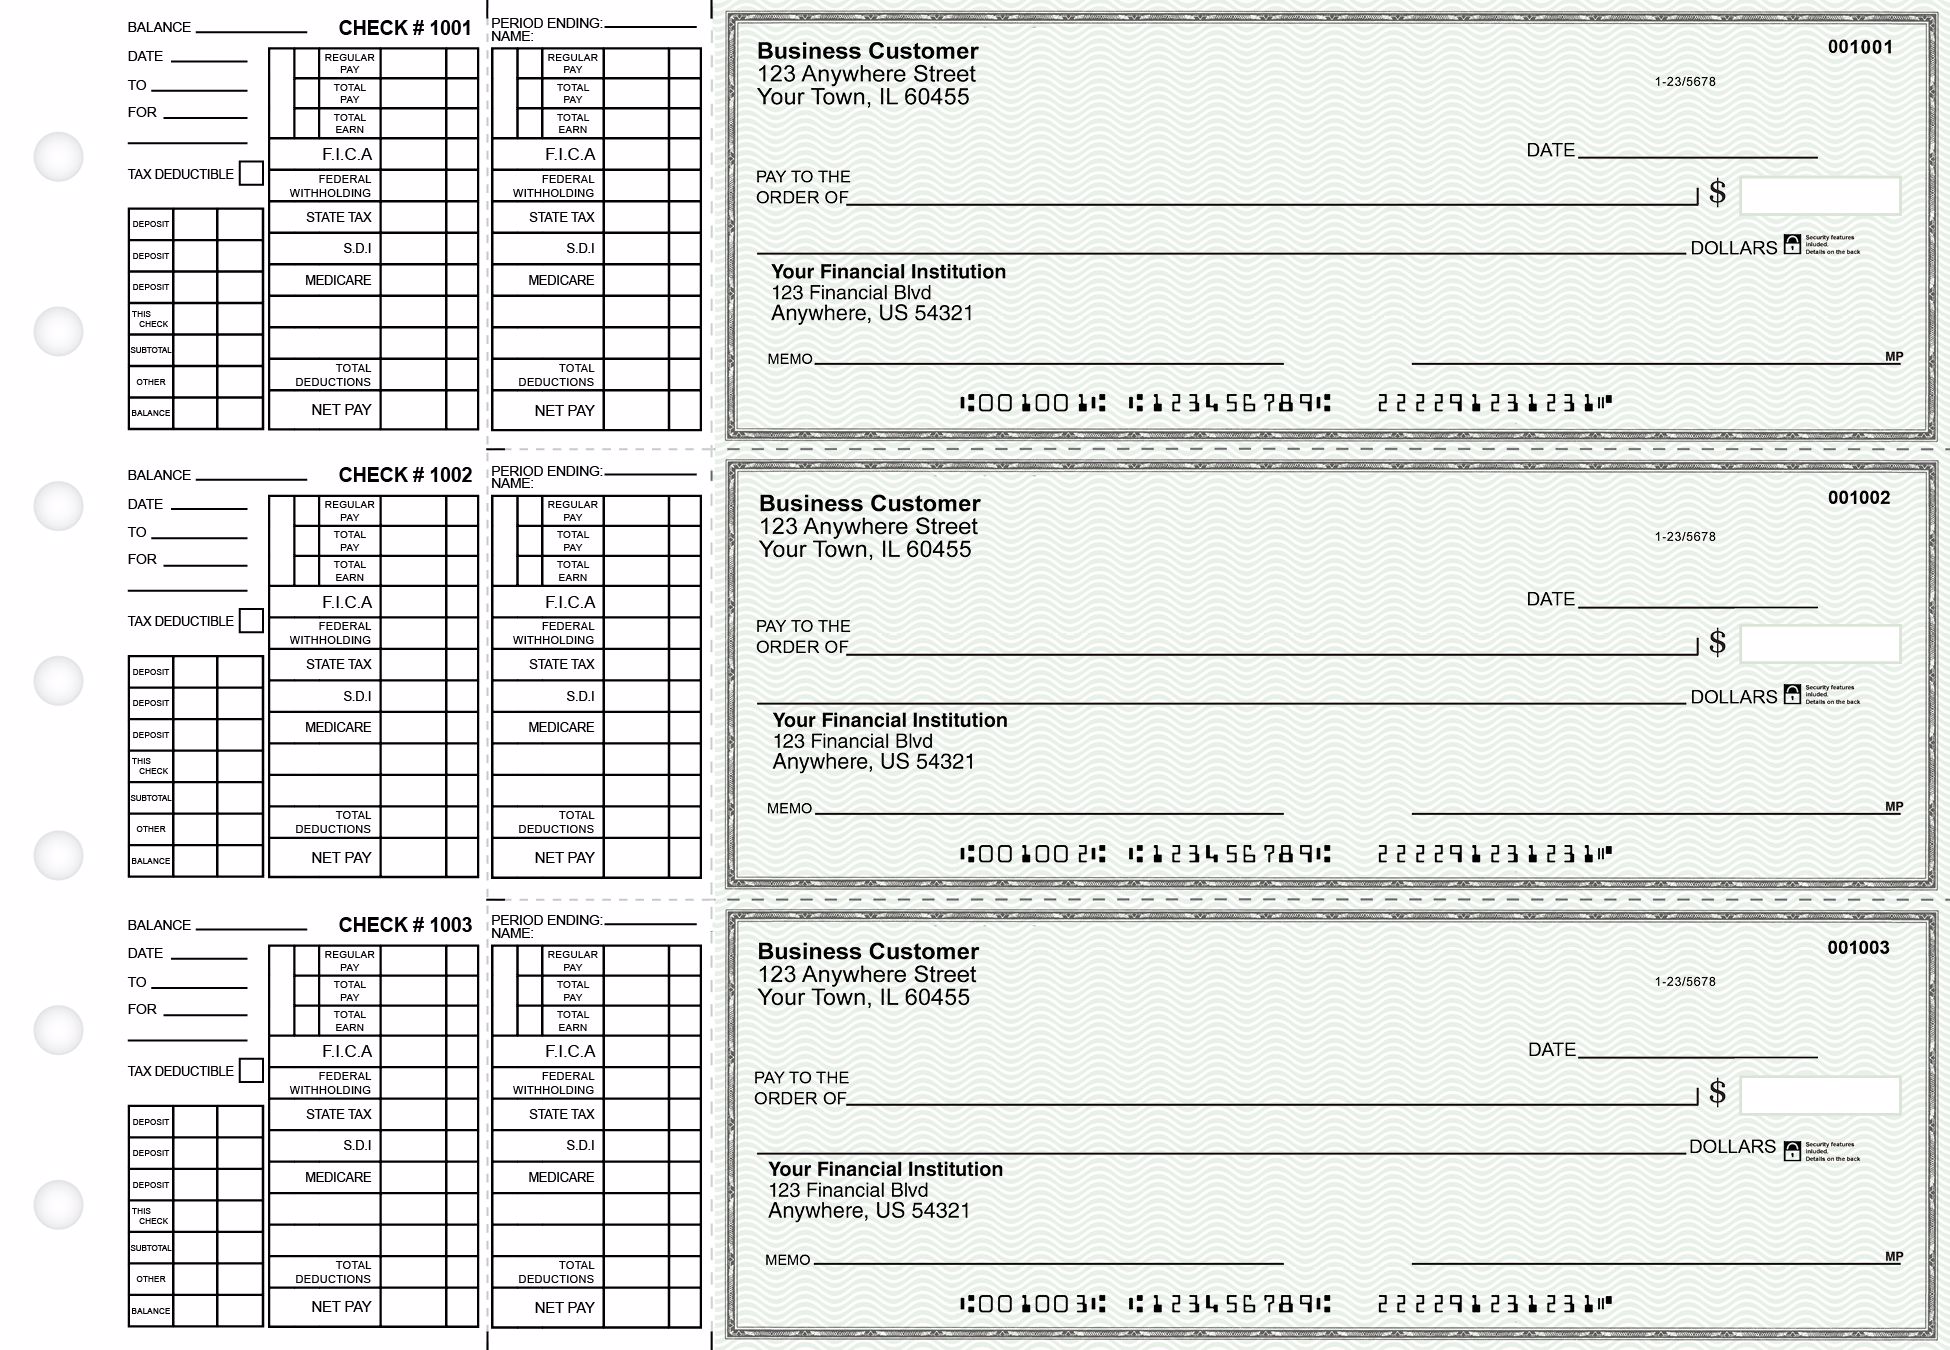
Payroll business checks are a separate format for exactly this reason, and making payroll checks covers running the cycle itself.
How do you record a restricted fund on a check?
Put it on the stub, not the memo line. Restricted funds are the thing a funder or auditor is most likely to test, and the memo line is the weakest place in the whole document to record anything.
A memo is written by whoever prepared the check. It reads as evidence and it is not. A voucher stub has room for the fund name, the budget line and the approval reference, and it stays attached to the record that gets tested.
- Fund name in full. Abbreviations stop meaning anything once the person who invented them leaves.
- Budget line or grant reference. This is the field that answers the funder's question.
- Approval reference. Point at the minute, form or initialed invoice that authorized it.
- Never split a restricted payment across funds on one stub without showing the split.
What should you do with voided checks?
Keep them. Federal guidance for grant funded programs asks that a void be defaced and then filed rather than thrown away, with the signature area the part you deface.
The reason is the sequence. A void that was thrown away and a check that is genuinely unaccounted for look identical in your records, and only one of them is innocent.
- Write VOID clearly across the face so it cannot be presented.
- Deface the signature area rather than the whole document.
- File it in number order with the rest of the sequence.
- Note the void in the register against its number.
- Never tear it up. That converts a clean record into an open question.
Our guide to what is a voided check covers the mechanics and the other reasons a void gets requested.
How do you keep blank check stock secure?
Treat blank stock as cash, because in practical terms it is. Nonprofit guidance raises access to blank checks as a question in its own right, alongside who may sign them, and in a shared office that question has a different answer every day unless someone fixes it.
- Locked, and not in the same drawer as the signature stamp.
- One named custodian, with a deputy, rather than a shared key.
- Log the number range on arrival, before the box goes away.
- Issue in sequence and record what was taken out.
- Count what is left periodically. A surprise count is a recommended nonprofit control.
Writing checks by hand has its own discipline, covered in how to write a business check by hand.
Related reading
- Check signing policy covers what to put in the written document your board adopts.
- Who signs a business check covers signing authority at the bank.
- Check register covers the record that makes sequence review possible.
- Types of business checks covers every format in one place.
What to do next
Start with two things that cost nothing. Record the check number range the next time stock arrives, and move the bank statement into the hands of someone who does not prepare payments.
Then make the document carry its share. Business checks are available in every format described here, with two signature lines where your policy needs them, and high security business checks add tamper resistance on the same stock. Both are produced the same day and delivered the next.
About the Author
The Checks Next Day team prints and ships business checks for U.S. organizations every business day, including churches, charities and grant funded nonprofits, with same day production and next day delivery. Questions about signature lines, separate payroll sequences and what a stub needs to show come up constantly at order time, and the guidance here reflects those conversations alongside published nonprofit and federal grant control guidance. Your bylaws, funder agreements and auditor requirements govern your organization, so confirm specifics with your accountant and your board.
You wrote a check, mailed it, and now it is lost, wrong, or no longer owed. The one tool you have is a stop payment, and it runs on a clock that most people only learn about when they need it.
This guide explains how a stop payment on a check works for a business account. You will see who is allowed to request one, how long it lasts, what happens if it is too late, and how to keep records so your books and your bank agree.
Quick Summary
A stop payment on a check is an instruction to your bank not to pay one specific check you wrote. Any authorized signer can request it, a written order lasts six months, and it only works if the check has not already been paid. It does not cancel what you owe the payee.
- Any authorized signer can request it. On a business account that needs two signatures, one authorized signer is still enough to stop a check.
- Timing decides the outcome. Your bank must receive the order early enough to act before it pays the check, so look at your account first and call the same day.
- Written orders last six months. A phone request lapses after 14 calendar days unless you confirm it in writing, and a renewal must be in writing while the first order is still active.
- A stop payment does not cancel the debt. The payee may still be owed, so plan a replacement payment or a clear conversation.
- Bank-issued items usually work differently. Cashier's checks and money orders generally cannot be stopped with an ordinary stop payment order.
- Records protect you. If a bank pays a stopped check by mistake, you carry the burden of proving the loss, so keep the confirmation and log every request.
| Question | Short answer |
|---|---|
| Who can request it? | Any person authorized to draw on the account, even when two signatures are normally required. |
| How long does a written order last? | Six months, renewable in writing. |
| How long does a phone order last? | 14 calendar days, unless confirmed in writing. |
| When is it too late? | When the bank has already paid or processed the check. |
| Does it cancel the debt? | No. You may still owe the payee. |
| What does it not cover? | Cashier's checks and money orders generally, and electronic payments, which follow other rules. |
What is a stop payment on a check?
A stop payment on a check is a formal instruction you give your bank not to pay one specific check that you wrote. The bank flags that check on your account, and if it shows up later, it is returned unpaid instead of being charged to you.
The right belongs to the account holder, not to the payee. Under the Uniform Commercial Code, a customer can stop payment on an item drawn on their account, as long as the order describes the item well enough for the bank to find it (UCC section 4-403). Most states have adopted their own version of that code, and your account agreement adds its own rules. Treat this guide as general information, not legal advice, and confirm the details with your bank.
How is a stop payment different from voiding a check?
Voiding is something you do on your own side. You mark the check void, record it, and keep it. A stop payment is something your bank does after the check has left your hands. If the check is still on your desk, voiding is the simpler fix and no bank request is needed.
Our guide to what a voided check is shows how to do it properly.
Is a stop payment the same as canceling a check?
In everyday speech, yes. People say cancel, stop, or put a hold on a check and usually mean the same bank instruction. In banking language, though, a canceled check is one that has already been paid and returned to you as proof of payment, which is the opposite situation.
When should a business stop payment on a check?
A stop payment is for the moment when a check is out of your hands and paying it would be a mistake or a risk. Common business reasons include:
- A check lost in the mail. The vendor says it never arrived and you plan to send a replacement.
- A stolen checkbook or an altered check. Check stock is missing, or a mailed check was tampered with.
- A wrong amount, wrong payee, or duplicate payment. You spot the error after the check is mailed.
- A check issued in error. An approval was withdrawn, or the payment went to the wrong vendor or employee.
- A genuine order dispute. The goods never shipped or the job was cancelled before work began.
Should you stop payment on a lost check?
Usually yes, but not before a quick check. Look at your online statement first to confirm the check has not been paid. Then place the stop payment before you send a replacement. If you send the second check first, both can be cashed and you pay twice.
The Consumer Financial Protection Bureau confirms that you can stop payment on a lost check and write a new one, and that you can ask the party who lost it to reimburse any fee your bank charges.
What if the checkbook or a mailed check may have been stolen?
Treat it as a fraud risk, not just a lost payment. A stop payment covers only the checks you name. If the whole checkbook is missing, or a mailed check was changed after it left your office, speak to your bank about the account itself.
The same UCC section lets a customer close the account, and a new account means a new account number on your next checks. Our article on check washing explains how mailed checks get altered and who pays.
Who can stop payment on a business check?
Any person who is authorized to draw on the account can stop payment. Where an account requires more than one signature, any one of those signers can still stop payment. That comes straight from UCC section 4-403(a), and it matters for businesses. One signer can halt a check that two people were meant to approve, which is by design, because stopping a payment is a protective step.
The right does not extend to the other side. A vendor, a customer, or an employee holding a paycheck cannot ask your bank to stop it. Only your side of the account can.
Put this in writing. Decide who may request stop payments, who approves the replacement, and who records it. Our check signing policy guide covers what to write down, and who signs a business check explains signing authority in plain terms.
How do you stop payment on a check step by step?
The steps below work for most business accounts. Your bank may have its own form or phone line, so use this as a checklist and follow your bank's process.
- Confirm the check has not been paid. Look at pending and posted items in online banking. If it has cleared, a stop payment cannot help.
- Gather the check details. You need the check number, exact amount, date, and payee, as listed below.
- Contact your bank right away. Depending on the bank, that means online banking, the app, a phone call or a branch visit.
- Give the order and get a reference. Ask for a confirmation number or a written copy of the order.
- Confirm in writing. If you gave the order by phone, send written confirmation within 14 days so it does not lapse.
- Tell the payee and arrange the replacement. Explain that the original is stopped and do not issue the new check until the stop is in place.
- Record it and set a reminder. Log the request and note the date the order will expire.
What information does your bank need to stop a check?
The bank has to be able to identify the exact item. Have these details ready before you call:
- The check number, printed on the check and listed in your register
- The exact amount, in dollars and cents
- The date written on the check
- The payee name, exactly as written
- Your account number, if the bank asks for it
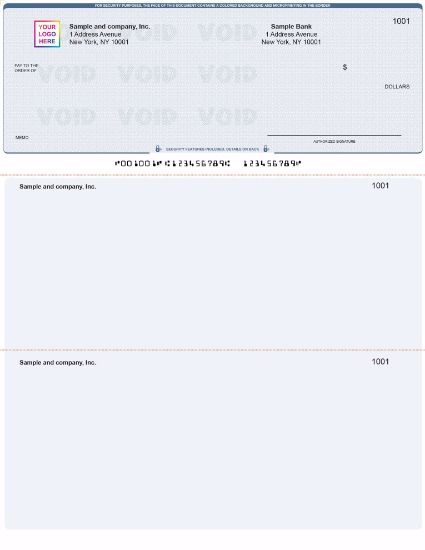
Can you stop payment on a check without the check number?
Sometimes. The order must describe the check clearly enough for the bank to find it, so a precise amount, date and payee all help. The check number is still the most reliable detail. You can usually find it in your check register or online statement, and the MICR line on a returned check image shows it as well.
How long does a stop payment on a check last?
A written stop payment order lasts six months. A phone order lapses after 14 calendar days unless you confirm it in writing within that time. Both rules come from UCC section 4-403(b), and your bank may apply its own, sometimes longer, limits.
| Situation | How long it lasts | What you need to do |
|---|---|---|
| Order given in writing | Six months | Renew in writing before it ends if the check could still be presented. |
| Order given by phone only | 14 calendar days | Confirm in writing within 14 days or the order lapses. |
| Renewal | Another six months | Give it in writing while the original order is still in effect. |
| Check presented after its six month stale date | Bank is not required to pay it | Do not rely on this alone, because a bank may pay a stale check in good faith. |
The six months matter because the stopped check does not disappear. It is still a piece of paper that someone could try to deposit later. Put the expiry date in your calendar a few weeks early.
A bank is also not required to pay an ordinary check presented more than six months after its date (UCC section 4-404), but it may choose to pay one in good faith. Our guide on how long a business check is good for covers stale dating in full.
Can you renew a stop payment order?
Yes. A renewal gives you another six months, but it has to be given to the bank in writing while the original order is still active. If it expires first, you start over, and the check could be paid in the gap.
Can you remove a stop payment?
You can ask your bank to release it, and each bank has its own process. Before you do, remember that the check becomes payable again. If a replacement has already gone out, releasing the stop on the original can lead to a double payment.
Can you stop payment on a check that was already deposited or cashed?
Usually not. The order has to reach the bank early enough for the bank to act on it before it pays the check. Once the check has been paid, there is nothing left to stop.
A deposit does not always mean payment has happened yet. A deposited check can still be pending, so a stop payment may work. Do not count on it, because checks can be processed quickly. That is why the first step is always to check your account, and the second is to act the same day.
If the check has already been paid, do the following:
- Call your bank immediately and explain exactly what happened.
- Say whether the payment was proper. An altered amount or a forged signature is a different kind of claim from a late stop payment.
- Contact the payee and ask for the money back if the payment was an error.
- Document everything, including dates, names and reference numbers.
- Review your controls so the same gap does not repeat.
Banks and state law set deadlines for reporting unauthorized or altered checks, so do not wait. For the fraud side of this, read our article on check washing.
What happens if the bank pays a check after you stopped payment?
If a stopped check is paid anyway, the law puts the work on you. Under UCC section 4-403(c), the customer must prove both the fact and the amount of the loss that came from paying against the stop payment order. In practice that means a clean paper trail.
From the payee's side, a properly stopped check that is deposited should come back unpaid. Keep these items on file in case you ever need to prove it:
- The confirmation number or a copy of the written order
- The date and time you gave the order
- The check details you provided
- The statement line showing the payment
- Your messages with the payee
Is it legal to stop payment on a check?
Yes. Stopping payment is a right of the account holder, and there are many ordinary reasons to use it. What matters is why you use it. A stop payment does not cancel what you owe, and the Consumer Financial Protection Bureau's own answer for a lost check is to stop payment and write a new one, not to skip the bill.
If you stop payment for goods or services you received and accepted, the payee can still pursue the debt. Depending on the facts and your state, the consequences can go beyond a civil claim. If there is a real dispute, tell the payee, put your position in writing, and consider advice from an attorney.
Should you stop payment after services were rendered?
Only when there is a genuine dispute that you cannot resolve any other way. A stop payment is not a negotiating tool. A better route is to raise the issue directly, offer a partial payment for work that was done, and keep the conversation in writing.
Which checks and payments cannot be stopped this way?
- Cashier's checks and money orders. The bank is the issuer, so the ordinary stop payment order generally does not apply. Lost or stolen items are generally handled through the issuing bank instead.
- Checks that have already been paid. Once the bank has paid the item, the window has closed.
- Electronic payments. ACH and card payments follow other rules and deadlines, so ask your bank instead of assuming the check process applies.
How should a business track stop payments and replacement checks?
Calling the bank is only half the job. For a business, the harder part is the paper trail. A stopped check that still shows as outstanding breaks your reconciliation, and a replacement that is not linked to the original invites a double payment.
| Situation | Best action | Watch out for |
|---|---|---|
| The check is still on your desk | Void it and record it | No bank request is needed, but keep the voided check. |
| A vendor says the mailed check never arrived | Confirm it is unpaid, stop payment, then reissue | Reissuing first can leave two valid checks. |
| The checkbook or check stock is missing | Call the bank about the account, stop the affected checks, consider a new account | A stop payment covers only the checks you name. |
| The amount or payee was wrong on a mailed check | Stop payment and send a corrected check | Tell the payee to discard the original. |
| An old check is still outstanding past six months | Confirm it is unpaid, reissue, and void the old one in your books | A bank may still pay a stale check in good faith. |
| An employee says a paycheck was lost | Stop payment, then issue a replacement | Keep the payroll record and the replacement linked. |
Once the decision is made, follow the same routine every time:
- Log the request the same day, using the columns shown in the log table below.
- Void the original in your register or accounting software and note the bank reference.
- Link the replacement. Write the original check number in the memo or register line of the new check.
- Send written confirmation to your bank within 14 days if you gave the order by phone.
- Set a renewal reminder a few weeks before the six month order ends if the old check could still surface.
- Review it at month end. Stopped checks should appear as voided in your books, not as outstanding.
| Log column | What to record |
|---|---|
| Date requested | The day and time you gave the order to the bank |
| Check number | The number printed on the stopped check |
| Payee and amount | Exactly as written on the check |
| Reason | Lost, stolen, wrong amount, issued in error, or disputed |
| Requested by | The authorized signer who placed the order |
| Method and bank reference | Phone, online or written, plus the confirmation number |
| Order expires | Six months from a written order, or 14 days from a phone-only order |
| Replacement check number | The new number, so the two checks stay linked |
How do you handle a stop payment on a payroll check?
The process is the same, but the records matter even more. Stop the original, void it in your payroll records, and issue a replacement under a new number. Our guides to making payroll checks and whether payroll checks can bounce cover the surrounding rules, and the payroll checks page shows the formats we print.
Should you reissue a replacement with the same check number?
No. As a practical rule, never reuse the number of a stopped check. The original is still a live item until its order expires, and reusing the number makes reconciliation and bank matching harder. Use the next number in your sequence and write the old number in the memo.
What do you need to reorder replacement checks?
If checks were lost or a checkbook was stolen, you may need a fresh supply quickly. When you order computer checks from Checks Next Day, the order asks for four details: your bank routing number, your account number, a starting check number, and your business name and address. Our guide to ordering business checks for the first time walks through each one.
Choose a starting check number above the highest number you have issued, including any stopped checks. If you opened a new account after a theft, double check the new account number before you submit.
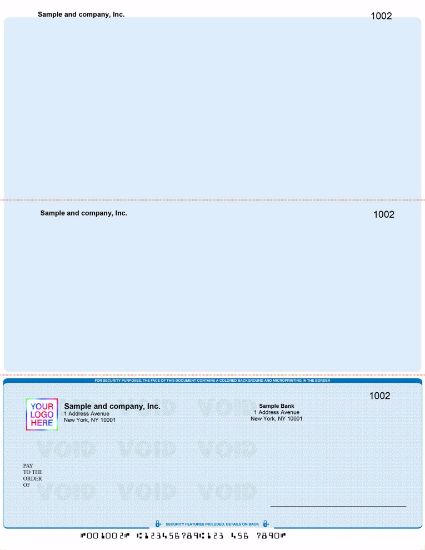
Prefer to write checks by hand? Manual business checks work the same way for the numbering. Orders placed before 2:00 PM Eastern on a business day are produced the same day for next-day arrival when the details are complete, as explained on our same-day production page.
What should you do next?
- Check your account today and confirm whether the check has been paid.
- Place the stop payment, get a reference, and follow up in writing if you used the phone.
- Log it, void the original in your books, and set a renewal reminder.
- Replace the payment with a new check under a new number.
If you need new checks while you sort this out, contact us and we will help you choose the right format.
Why businesses order checks from Checks Next Day
Printed with your bank details. You enter your routing number, account number, starting check number, and business name and address when you order.
Same-day production on weekday orders. Orders placed before 2:00 PM Eastern, Monday through Friday (excluding holidays), are produced and shipped the same business day for next-day arrival, as long as the details are complete and verified.
Formats that match how you work. Choose computer checks, manual business checks or blank check stock to suit your software and workflow.
Faster reorders. Reorders usually move faster because artwork and specifications are already on file.
About the Author
The Checks Next Day team writes about business checks, check printing and check safety for small businesses.
You have decided to move your business to a new bank. The new account is open, but the drawer is still full of checks that carry the old account number, and a few payments are still on their way to vendors.
This guide explains what to do with your business checks when you are changing banks. You will see what happens to old checks, how to handle the ones already out, when to order new ones, and how to avoid cash flow surprises in the first month.
Quick Summary
Your old checks work only for the old account, so a bank change means new checks, a plan for outstanding payments and a safe way to dispose of unused stock. The CFPB's checklist for moving an account advises leaving enough money in the old account to cover checks that have not cleared and closing it only when everything runs through the new one.
- Old checks stop working with the account. They carry the old routing and account numbers.
- Leave the old account funded. Outstanding checks and automatic payments need money until they clear.
- Order new checks early. You need the new routing number, account number and a starting check number.
- Shred unused old checks. They still show your business details and account number.
- Expect holds on the new account. For the first 30 calendar days, large check deposits can be held longer.
- Keep your records. Download statements and check images before you close anything.
| Question | Short answer |
|---|---|
| Can I use my old checks? | No. They belong to the old account. |
| What about checks already mailed? | Keep the old account open and funded until they clear. |
| When should I order new checks? | As soon as the new account details are final. |
| What do I do with unused old checks? | Destroy them securely. |
| Will deposits be held at the new bank? | Possibly, during the first 30 calendar days. |
| How do I avoid double payments? | Cancel old automatic debits only after new ones are working. |
What happens to your business checks when you change banks?
Every check is printed for one account. The routing number and account number in the MICR line at the bottom tell banks where to send it for payment. When that account is closed, the numbers no longer lead to a working account. Our guide to the MICR line on a check explains each number.
| Type of check | What happens | What to do |
|---|---|---|
| Unused checks from the old account | They cannot be used once the account is closed. | Destroy them securely and order new ones. |
| Checks written but not yet deposited by the payee | They can still be presented to the old account. | Keep the old account open and funded. |
| Checks deposited but not yet cleared | They can be paid or returned based on the balance. | Keep a buffer in the old account. |
| Old checks held by a payee for a long time | They can go stale after six months. | Contact the payee and reissue. |
| New checks from the new account | They pay from the new account. | Use a clear new starting number. |
Why can't you reuse old checks at the new bank?
A check does not carry a bank's name only for show. Its routing and account numbers decide where the payment goes. A new bank means new numbers, so new checks are needed.
How do you switch business bank accounts step by step?
The CFPB publishes a checklist for moving a checking account. It is written for consumers, but the order of steps works for a business too (CFPB checklist for moving your checking account). Here is the same sequence adapted for the checks side.
- List automatic payments and deposits. Include every automatic debit and credit that moves through the old account each month.
- Reroute your deposits. Update the account details with customers, payroll and anyone else who pays you.
- Find out when the first deposit will arrive. Then start automatic debits from the new account after that date, and cancel the old ones so no bill is paid twice.
- Leave money in the old account. Keep enough to cover checks that have not cleared and payments not yet processed.
- Order new checks. Confirm the new routing number, account number and starting check number.
- Move the leftover balance. Do this only after deposits and payments run through the new account.
- Close the old account in writing. The CFPB advises asking for written confirmation.
What extra steps matter for a business?
- Payroll. Update the payroll system and tell employees which account the next checks come from.
- Customer payment instructions. Update invoices, your website and any saved details customers use.
- Accounting software. Add the new account and keep the old one until it is reconciled to zero.
- Separate business account. Keep business money in a business account, as the IRS recommends in Publication 583.
When should you order new business checks?
As soon as the new account details are final. When you order computer checks from Checks Next Day, the order asks for four details: your bank routing number, your account number, a starting check number, and your business name and address. Our guide to ordering business checks for the first time walks through each one.
What starting check number should you choose?
Pick a number that does not overlap with any check still outstanding from the old account. That keeps every payment easy to identify when it clears. Our check register guide explains why separate registers for separate accounts help.
Orders placed before 2:00 PM Eastern on a business day are produced the same day for next-day arrival when the details are complete and verified, as explained on our same-day production page. Prefer to write by hand? Manual business checks follow the same numbering rules.
What should you do with checks you already wrote?
Leave the old account open and funded until they clear. The CFPB checklist advises keeping enough money in the old account to cover checks that have not cleared. A check can reach the bank days or weeks after you mail it, and an ordinary check is generally stale after six months, though a bank may still pay it (UCC section 4-404). Our guide on how long it takes for a check to clear explains the timing.
| Column | What to record |
|---|---|
| Check number | The number printed on the check |
| Payee and amount | Exactly as written |
| Date mailed | The day it left your office |
| Cleared date | The day the bank posted it |
| Follow-up date | When to contact the payee if it has not cleared |
What if a payee has not deposited an old check?
Contact them. If it is lost or too old, follow the steps in our guide to stopping payment on a check, then issue a replacement from the new account under a new number. Our stale check guide covers the six month rule.
What should you do with unused checks from the old account?
Destroy them securely. They still show your business name, routing number and account number, and a stolen blank check is a fraud risk. Shred them, record the range of check numbers you destroyed, and keep a single voided sample if your accountant wants one. Our guide to whether blank checks expire explains why old stock should not sit in a drawer, and the article on check washing shows how account details get abused.
Will your new business account have deposit holds?
Possibly. Under Regulation CC, an account is new for its first 30 calendar days. For a new account, the first $6,725 of check deposits per banking day follows the normal schedule, and any excess can be held until the ninth business day after deposit (Regulation CC exceptions). Cash and electronic payments must still be available the next business day.
| Situation | Plan |
|---|---|
| You expect a large check in the first month | Ask the payer for an electronic payment or deposit the check early. |
| Payroll is due soon after opening | Fund the account with a transfer you can control. |
| Customers still pay the old account | Update payment details before moving the balance. |
| You are unsure which hold applies | Ask the bank for its funds availability policy in writing. |
How do you keep your records clean through a bank change?
- Download everything first. Save statements, check images and reconciliations for the old account.
- Reconcile the old account to zero. Do it before you close it.
- Keep one register per account. Do not mix numbering sequences.
- Note the switch date. Write it in your books and on the last page of the old register.
- Follow your retention schedule. See our guide to how long to keep business checks and bank records.
How do you handle payroll during a switch?
Run payroll from one account at a time and tell employees in advance. Keep the old account funded until every payroll check written from it has cleared. Our guides to making payroll checks and whether payroll checks can bounce explain the risks of a short balance.
What should you do next?
- List every outstanding check and automatic payment on the old account.
- Confirm the new routing number, account number and starting check number.
- Order new checks and set a date to stop using the old ones.
- Plan cash flow for the first 30 days of the new account.
- Shred old stock and close the old account only after everything has cleared.
If you need help choosing a check format, contact us and we will point you to the right one.
Why businesses order checks from Checks Next Day
Printed with your bank details. You enter your routing number, account number, starting check number, and business name and address when you order.
Same-day production on weekday orders. Orders placed before 2:00 PM Eastern, Monday through Friday (excluding holidays), are produced and shipped the same business day for next-day arrival, as long as the details are complete and verified.
Formats that match how you work. Choose computer checks, manual business checks or blank check stock to suit your software and workflow.
Faster reorders. Reorders usually move faster because artwork and specifications are already on file.
About the Author
The Checks Next Day team writes about business checks, check printing and check safety for small businesses.
A new supplier will not ship until payment is guaranteed. Your regular business check is good, but they want something stronger, and the bank teller asks whether you want a cashier's check or a certified check.
This guide explains the difference between a cashier's check and a certified check for a business. You will see how each one works, whether you can stop payment, how fraud happens, and which option fits which situation.
Quick Summary
A cashier's check is drawn by a bank on its own funds, while a certified check is drawn on your account and accepted by the bank. Both give the payee a bank-backed payment, but neither one is automatically safe to accept, and neither is usually something you can stop once it has left your hands.
- Cashier's check: the bank is both the drawer and the drawee, so the bank itself is behind the payment.
- Certified check: a check on your own account that the bank has accepted, so it is still your check with a bank promise added.
- Stop payment is limited. A customer generally cannot place a stop payment order on a cashier's check.
- Funds can be available before the check is verified. Cashier's and certified checks deposited in person must be available the next business day.
- Fakes are the real risk. The FTC warns that a check can look real, even to bank employees, and that a bank can take weeks to discover it is fake.
- Banks are not required to certify. Ask ahead of time and have a backup plan.
| Feature | Cashier's check | Certified check |
|---|---|---|
| Drawn on | The bank's own funds | Your account |
| Who stands behind it | The issuing bank | The bank that accepted it |
| Who is the drawer | The bank | You, the account holder |
| Stop payment by the buyer | Generally not available | Depends on your bank, so ask |
| Funds availability when deposited in person | Next business day | Next business day |
| Main risk to the payee | Counterfeit versions | Counterfeit or altered versions |
What is a cashier's check?
A cashier's check is a draft where the drawer and the drawee are the same bank, or branches of the same bank (UCC section 3-104). Put simply, the bank writes a check to the payee, drawn on the bank itself. You pay the bank for the amount and any fee, and the bank issues the check.
Because the bank is both the writer and the payer, the payee is relying on the bank, not on your account balance. That is why sellers, landlords and title offices ask for cashier's checks when they want certainty.
Is a teller's check the same as a cashier's check?
Not quite. A teller's check is a draft drawn by a bank on another bank, or payable at or through a bank. Many people use the two names loosely, and federal funds availability rules group cashier's, certified and teller's checks together for next-day treatment when deposited in person.
What is a certified check?
A certified check is a check that the bank on which it is drawn has accepted. The Uniform Commercial Code says certification can be shown by a writing on the check that says it is certified, and that the bank has no obligation to certify a check (UCC section 3-409). The check remains drawn on your account, so you are still the person who wrote it.
In practice, the bank usually confirms that your account has enough funds before it certifies the check. Ask your bank how it handles the funds after certification, because policies differ.
What is the difference between a cashier's check and a certified check?
The core difference is whose money and whose name is on the check. A cashier's check is the bank's own check. A certified check is your check with the bank's acceptance added.
| Question | Cashier's check | Certified check |
|---|---|---|
| Whose check is it? | The bank's | Yours, with the bank's acceptance |
| Where does the money come from? | You pay the bank when you buy it | Your account, checked at certification |
| Which bank obligation applies? | The issuing bank is obligated on its own check | The bank that accepted the check is obligated |
How do both compare with a regular business check?
| Feature | Business check | Cashier's check | Certified check |
|---|---|---|---|
| Funds come from | Your account, when the payee deposits | The bank, after you pay it | Your account, confirmed by the bank |
| Bank guarantee | None | Yes | Yes |
| Stop payment | Available if you act in time | Generally not available | Ask your bank |
| Speed to the payee | Same day, if you hand it over | Needs a bank visit first | Needs a bank visit first |
| Best for | Routine payments | Large or high-trust payments | A payment that must come from your account |
For normal payments, a printed business check is faster and easier to track. Our guides to computer checks and manual business checks show the formats we print.
Which should a business use?
| Situation | Best fit | Why |
|---|---|---|
| Regular supplier on open terms | Business check | Fast, numbered and easy to record. |
| New vendor demanding guaranteed funds | Cashier's check | The bank stands behind it from its own funds. |
| A payee that requires a check on your account | Certified check | It stays your check, with bank acceptance. |
| A large one-off purchase or deposit | Cashier's check | Gives the payee clear certainty. |
| Payroll | Business check or direct deposit | Official checks are not built for repeat payments. |
Remember that a bank guarantee also removes some of your options. A check you wrote can be stopped if the goods never arrive, but an official check generally cannot. Read our guide to stopping payment on a check to see the difference.
Can you stop payment on a cashier's check or a certified check?
Generally not on a cashier's check. The Office of the Comptroller of the Currency explains that a customer usually cannot place a stop payment order on a cashier's check, because the check is drawn on the bank itself and the bank generally must pay it when presented (OCC guidance on stopping payment on official checks). If a cashier's check is lost, stolen or destroyed, or you suspect fraud, contact the bank immediately.
A certified check is different because it is drawn on your account, but the bank's acceptance changes the picture. Ask your bank what happens if you need to stop a certified check, and get the answer before you request one.
What is an indemnity bond for a lost cashier's check?
The OCC describes an indemnity bond as a type of insurance policy that a bank may require before it issues a replacement for a lost cashier's check. Ask the bank what it needs and how long the process takes.
Are cashier's and certified checks always safe to accept?
No. The FTC warns that fake checks can look real, even to bank employees, and that seeing funds in your account does not mean the check is good (FTC fake check guidance). It can take weeks for a bank to discover a check is fake, and by then you may have to repay the bank.
This is the same gap we describe in our guide on how long it takes for a check to clear. Funds can be available well before a check is final.
What should you do before accepting a large official check?
- Know the sender. The FTC advises against relying on check money from someone you do not know and trust.
- Check the amount. Do not accept a check for more than the amount owed, and do not send the difference back.
- Contact the issuing bank. Use a phone number you found yourself, not one printed on the check.
- Deposit it at your bank. Ask the teller to confirm with the issuing bank if you are unsure.
- Wait for confirmation. Do not ship goods or send refunds until the bank says the check is paid.
- Keep records. File a copy of the check, the deposit receipt and your notes.
For another example of timing risk with deposits, see our article on check kiting fraud.
What happens if the bank refuses to pay a cashier's or certified check?
Under UCC section 3-411, the person entitled to enforce the check can recover compensation for expenses and lost interest if the bank wrongfully refuses to pay a cashier's or certified check, and in some cases consequential damages if the bank was told about the particular circumstances (UCC section 3-411). There are exceptions, such as when the bank reasonably believes it has a claim or defense, or has reasonable doubt about who is entitled to enforce the check.
How should a business record cashier's and certified checks?
- Record the payment when you buy the check. The money leaves your account at that point.
- Keep the receipt. It shows the date, amount, payee and remitter.
- Note the check number. Put it beside the payment in your books.
- Copy the check before you hand it over. A photo or scan is enough.
- Follow up with the payee. Confirm receipt, and store their acknowledgement.
Use the same discipline you use for ordinary checks. Our guide on how to use a check register explains the entries, and how long to keep business checks and bank records covers retention.
What should you do next?
- Ask your bank whether it certifies business checks and what it needs.
- Decide which payments need a bank guarantee and which do not.
- Write a short rule for verifying any official check you receive.
- Keep your regular business checks stocked for everything else.
Need a fresh supply of checks? Contact us and we will help you choose the right format.
Why businesses order checks from Checks Next Day
Printed with your bank details. You enter your routing number, account number, starting check number, and business name and address when you order.
Same-day production on weekday orders. Orders placed before 2:00 PM Eastern, Monday through Friday (excluding holidays), are produced and shipped the same business day for next-day arrival, as long as the details are complete and verified.
Formats that match how you work. Choose computer checks, manual business checks or blank check stock to suit your software and workflow.
Faster reorders. Reorders usually move faster because artwork and specifications are already on file.
About the Author
The Checks Next Day team writes about business checks, check printing and check safety for small businesses.
A supplier asks you to pay today, but your customer's money will not arrive until Friday. Writing a check dated for Friday sounds like a neat solution. Then the supplier deposits it on Tuesday, and the bank pays it.
This guide explains how a postdated check works for a business. You will see what the law says, how a bank treats a future date, how to give your bank notice, how long that notice lasts, and what to do instead when you need a payment to wait.
Quick Summary
A postdated check is a check dated in the future. Postdating is recognized by the Uniform Commercial Code, but it does not stop your bank from paying the check early unless you have given the bank formal notice. A date on the check is a request to the payee, not a control over the bank.
- The bank may pay early. Banks are permitted to pay a check before its date, so the funds must be there from the day the check leaves your hands.
- Notice is the only real control. To protect yourself, tell your bank about the postdating in time and in a way that identifies the check.
- Notice has a clock. It lasts as long as a stop payment order: six months in writing, or 14 calendar days if given only by phone.
- A bank that ignores valid notice can be liable. It may owe damages, including losses from other items that bounce as a result.
- The check can still go stale. The six month window runs from the date on the check.
- Better options exist. Holding the check until the date, or using scheduled payments, avoids the risk completely.
| Question | Short answer |
|---|---|
| Can I write one? | Yes. The UCC recognizes postdated instruments. |
| Can the bank pay it early? | Yes, unless you gave proper notice in time. |
| What does proper notice need? | It must identify the check with reasonable certainty and reach the bank in time to act. |
| How long does notice last? | Same as a stop payment order: six months in writing, 14 calendar days if oral. |
| Does the note 'do not deposit until' work? | Not as an instruction to the bank. |
| Is it safer to avoid postdating? | Often yes, for control and for clear records. |
What is a postdated check?
A postdated check carries a date later than the day you wrote and signed it. The idea is that the payee should wait until that date to deposit it. The Uniform Commercial Code recognizes this practice and states that an instrument may be antedated or postdated.
The law treats the date mainly as a payment term. For a check payable on demand, the date matters most when the bank decides whether the check is payable before that date, and that is where businesses run into trouble.
Is it legal to write a postdated check?
Postdating is not illegal in itself, and the UCC provides rules for it. What matters is whether the money is there when the check is paid. Postdating does not give you permission to write a check you cannot cover, and state rules can differ. If a payment is large or disputed, ask your accountant or attorney.
How is a postdated check different from a stale check?
They are opposites. One is dated in the future, while a stale check is older than six months. Our guide to how long a business check is good for explains stale dating, and the guide to writing a business check by hand shows where the date line goes.
Can a bank cash a postdated check early?
Yes. The OCC explains that banks are permitted to pay checks even though payment occurs before the date of the check, and that a check is payable on demand unless you submit a formal post-dating notice to your bank (OCC guidance on postdated checks). Under UCC section 4-401(c), a bank may charge a check to your account before its date if it is otherwise properly payable, unless you gave notice of the postdating (UCC section 4-401).
| Situation | What the bank may do | What it means for you |
|---|---|---|
| You gave no notice | May pay the check before its date. | Funds leave your account early. |
| You gave notice in time that identified the check | Should hold it until the date. | Your cash timing is protected. |
| You gave notice, but the bank paid anyway | May be liable for resulting damages. | Keep records; you may have a claim. |
| You gave notice too late for the bank to act | Notice may not protect you. | Give notice as early as you can. |
| Funds are not in the account at presentment | Returns the check unpaid. | Fees and a damaged payee relationship. |
Can the payee deposit the check before the date?
Physically, yes. Whether the bank pays it depends on the notice you gave. A payee who agreed to wait should hold the check until the date on it, and you should have that agreement in writing if the amount is meaningful.
What happens if a check returned as postdated is deposited again?
Federal funds availability rules treat a check returned as postdated differently when it is redeposited after its date. Redeposited checks are generally exempt from the standard schedules, but a check returned as postdated, whose reason for return says so, and which is no longer postdated when redeposited, is not exempt (Regulation CC exceptions).
In plain terms, that check gets the normal availability schedule when it is redeposited after its date, not an extra hold. For the timeline itself, see our guide on how long it takes for a check to clear.
How do you stop a bank from paying a postdated check early?
Give your bank formal notice. The UCC says the notice must identify the check with reasonable certainty, and it must reach the bank in time, and in a manner, that gives the bank a reasonable chance to act before it takes any action on the check. Banks may require a specific form and may charge a fee.
- Contact your bank before you hand over the check. Ask how it accepts postdating notices.
- Provide the check details. Give the check number, exact amount, payee name and the date written.
- State the earliest payment date. Make clear the check must not be paid before that day.
- Get a reference. Ask for a confirmation number or a copy of the notice.
- Confirm in writing. A phone notice lapses after 14 calendar days unless confirmed in writing.
- Diary the expiry. A written notice lasts six months, so renew it in writing if you need more time.
The duration matches a stop payment order. Our guide to how to stop payment on a check explains the six month and 14 day rules in detail.
Does a note on the check, like 'do not deposit until', work?
It can help the payee, but it is not an instruction to the bank. The OCC points to a formal post-dating notice to the bank, so use the note only as a courtesy and not as a control.
When does a postdated check go stale?
A bank is generally not required to pay an ordinary check presented more than six months after its date, though it may pay in good faith (UCC section 4-404). For this kind of check the six months run from the date written on the check, so postdating pushes the stale date back by the same amount. Keep that in mind if the check is held for a long time.
Should a business postdate checks?
Sometimes, but rarely. The main risks are early payment, cash flow surprises and confusing records. Use the table below to decide.
| Situation | Risk of postdating | Better option |
|---|---|---|
| A customer payment arrives Friday and a bill is due now | Bank may pay early and overdraw the account. | Wait until funds clear, then write the check. |
| A supplier wants security for a future payment | Supplier may deposit early. | Agree a written payment schedule and release each check on the date. |
| Rent or recurring bills on fixed dates | Many future-dated checks are easy to lose track of. | Use scheduled payments through your bank. |
| Payroll that must land on one day | Employees may deposit early. | Issue checks on the pay date. |
| You want to delay payment until a delivery is confirmed | Bank may pay before the delivery arrives. | Release the check once the delivery is confirmed. |
How should a business track checks dated in the future?
If you do issue one, treat it as a payment due now in your cash planning. The bank may pay it any day after you hand it over, so keep enough in the account to cover it.
| Log column | What to record |
|---|---|
| Check number and amount | As printed and written on the check |
| Payee | Exactly as written |
| Date written and date on check | The signing date and the future date |
| Reason | The agreement or payment term behind the postdating |
| Bank notice given | Date, method and bank reference |
| Notice expires | Six months from a written notice, or 14 days from a phone notice |
| Cleared date | The day the bank posts the payment |
| Approved by | The authorized signer who approved it |
Put the rule in your check signing policy, and decide who signs a business check so no one person issues them alone. Record each one in your check register as a payment due now, and read our guide to the voided check if you need to cancel one before it leaves your hands.
Can you postdate a payroll check?
You can, but it is a weak control. The bank may pay it early and employees may deposit it early. See our guides to making payroll checks and whether payroll checks can bounce.
What are better options than a postdated check?
- Hold the check until the date. Write and mail it when the funds are ready.
- Use scheduled payments. Ask your bank about payments set to leave on a chosen date.
- Agree a written schedule. Give each check to the payee on the agreed date.
- Pay in smaller amounts. Split a large bill into installments you can cover now.
- Use a stop payment notice only as a backup. It is a safeguard, not a plan.
What should you do next?
- Check your open payments and find any future-dated checks still outstanding.
- Ask your bank how it takes postdating notices and what it charges.
- Update your signing policy so postdating needs approval.
- Add a log for future-dated checks to your register or accounting routine.
Need new checks with a clear numbering sequence? Contact us and we will help you choose the right format.
Why businesses order checks from Checks Next Day
Printed with your bank details. You enter your routing number, account number, starting check number, and business name and address when you order.
Same-day production on weekday orders. Orders placed before 2:00 PM Eastern, Monday through Friday (excluding holidays), are produced and shipped the same business day for next-day arrival, as long as the details are complete and verified.
Formats that match how you work. Choose computer checks, manual business checks or blank check stock to suit your software and workflow.
Faster reorders. Reorders usually move faster because artwork and specifications are already on file.
About the Author
The Checks Next Day team writes about business checks, check printing and check safety for small businesses.
It is a quiet Friday, the filing season is over, and a filing cabinet full of old checks is taking up space. Shredding it feels tempting, but a missing check can leave you unable to prove an expense.
This guide explains how long to keep business checks and bank records. You will see the retention periods the IRS lists, which check records matter most, when a scan is enough, and how to organize it all so you can find any payment in minutes.
Quick Summary
A business should generally keep checks and bank records for at least three years, counted from the return they support, and longer in specific cases. Employment tax records should be kept for at least four years. This is general information, so confirm your own situation with an accountant.
- Three years is the usual starting point. The IRS says to keep records until the period of limitations for the return runs out, which is generally three years.
- Some cases need six or seven years. Six years applies if you leave out more than 25% of the gross income on your return, and seven years applies to worthless securities and bad debt deductions.
- Some records have no end date. Keep records indefinitely if you do not file a return or if you file a fraudulent one.
- Payroll records need at least four years. Employment tax records are kept for at least four years after the tax is due or paid.
- Canceled checks are supporting documents. They help prove expenses, inventory costs and asset purchases, and certain statements can stand in when a check is missing.
- Scans can replace paper. Only if the electronic system is tested and meets the IRS rules.
| Record or situation | Keep for |
|---|---|
| Records supporting a normal tax return | Generally 3 years |
| Income left out is more than 25% of gross income | 6 years |
| Worthless securities or bad debt deduction | 7 years |
| No return filed, or a fraudulent return | Indefinitely |
| Employment tax records, including payroll checks | At least 4 years after the tax is due or paid |
| Property records | Until the period of limitations ends for the year you dispose of the property |
How long should a business keep checks and bank records?
The IRS ties the answer to the period of limitations, the window in which a return can be assessed or a refund claimed. It says to keep records that support any income, deduction or credit until that period runs out (IRS guidance on how long to keep records). The periods below come from that page.
| Keep records for | When it applies |
|---|---|
| 3 years | The default, if none of the longer periods below apply to you. |
| 3 years or 2 years after tax was paid, whichever is later | If you file a claim for credit or refund after filing your return. |
| 6 years | If you leave out income you should have reported and the amount is more than 25% of the gross income shown on the return. |
| 7 years | If you claim a loss from worthless securities or a bad debt deduction. |
| Indefinitely | If you do not file a return, or you file a fraudulent return. |
| At least 4 years | Employment tax records, counted from the date the tax is due or paid, whichever is later. |
Why do the IRS periods differ?
The retention period follows the time the IRS has to examine a return or the time you have to claim a refund. The more unusual the situation, such as a large omission of income, the longer that time runs. That is why one rule does not fit every business, and why an accountant can confirm which period applies to you.
How long should you keep payroll and employment tax records?
Keep them for at least four years after the tax is due or paid, whichever is later. Payroll check numbers, dates and amounts belong in those records. Our guides to making payroll checks and the payroll checks we print explain what a payroll check should show.
Do property records follow the same period?
No. The IRS says to keep property records until the period of limitations ends for the year you dispose of the property, because you need them to work out depreciation and any gain or loss. A check that paid for equipment can therefore matter long after the purchase.
Which check records should a business keep?
The IRS publication on starting a business and keeping records lists canceled checks among the supporting documents that back up your books, along with sales slips, paid bills, invoices, receipts and deposit slips (IRS Publication 583). Canceled checks can show the cost of inventory, a business expense or an asset purchase.
| Record | Why keep it | Where it usually lives |
|---|---|---|
| Canceled checks or images | Prove who was paid, when and how much. | Bank statement packet or online banking. |
| Bank statements | Show the date the bank posted each item. | Bank portal and your files. |
| Check register or stubs | Show what you recorded at the time you wrote each check. | Checkbook, stubs or accounting software. |
| Voided checks | Explain gaps in the check number sequence. | Taped into the register or scanned with it. |
| Deposit slips | Match deposits to customers and invoices. | Bank copy and your files. |
| Bank reconciliations | Show that your books agree with the bank. | Accounting software or paper worksheets. |
| Stop payment confirmations | Link a stopped check to its replacement. | Email or letter from the bank. |
| Payroll check records | Support wages and employment taxes. | Payroll system and check register. |
Should you keep voided checks?
Yes. A voided check explains why a number is missing from your sequence, so keep it with your register and note the reason. Our guide to the voided check shows how to void one correctly, and how to use a check register covers the entries to make.
Why do deposit slips matter?
They tie each deposit to the customers behind it. Our guide to filling out a business deposit slip explains what to write so the slip is useful years later.
Do you still need canceled checks if your bank only sends statements?
You may not need the physical check, but you do need proof of payment. IRS Publication 583 says that when you do not have a canceled check, you may be able to prove payment with certain financial account statements. For checks, the statement has to show the date the bank posted the amount, and it has to be legible. The same publication warns that proof of payment alone does not establish a deduction, so you still need the invoice or receipt behind it.
| Source | What it shows | Watch out for |
|---|---|---|
| Returned canceled check | The payee, endorsement and amount. | Many banks no longer return paper checks. |
| Check image on your statement or portal | The front and often the back of the paid check. | Download images before online access expires. |
| Bank statement | The date the bank posted the payment. | Must be legible, with the posting date visible. |
| Copy requested from your bank | A reproduction of the paid check. | Banks may charge a fee and take time to respond. |
How long does a bank keep copies of your checks?
The Office of the Comptroller of the Currency says that banks it regulates that do not return canceled checks must keep the checks or a copy for five years, and must provide a copy within a reasonable time after you ask (OCC guidance on canceled checks). Your own retention period may be longer than five years, so do not rely on the bank alone.
Can you keep check records electronically instead of on paper?
Yes, if your storage system meets IRS requirements. Publication 583 says that all requirements that apply to hard copy books and records also apply to electronic storage. The original paper records may be destroyed if the system has been tested and compliance procedures are in place. A computerized system must produce legible records that reconcile with your books and your return.
- Scan clearly. Make sure the check number, amount, date, payee and both sides are readable.
- Name files consistently. Use the date and check number so one search finds the item.
- Store backups. Keep a second copy in a different place from the first.
- Test retrieval. Open a few random files every quarter to confirm they are complete.
- Document the system. Write down how scanning, naming and backup work, and who is responsible.
- Keep paper until the system is proven. Destroy originals only after the checks above are in place.
How should you organize check records so they are easy to find?
A simple structure beats a clever one. Sort by tax year, then by month, then by check number. Keep the bank statement, the register page and the reconciliation for a month together so one folder answers every question about that month.
- Use one numbering sequence. Sequential check numbers make gaps obvious.
- Record at the time of writing. Fill in the stub or register as you sign, not later.
- Reconcile every month. Mark each cleared check and note anything outstanding.
- Label the year. Put the tax year on the folder or file path before you close it.
How does check numbering help with retention?
Every number should be accounted for: paid, voided, stopped or outstanding. That is easier when your checks are printed in order. Our guide to ordering business checks for the first time explains how to set the starting number, and stop payment on a check shows how to document a stopped item. If you write by hand, the manual 3-per-page binder format keeps stubs and checks together.
How long does a check take to clear, and does it affect your records?
A check you wrote is not final in your books until it clears the bank, so keep it marked outstanding. Our guide to how long it takes for a check to clear explains the timeline.
When should you keep records longer than the IRS minimum?
The IRS minimum is a floor, not a ceiling. Before you discard records, the IRS advises checking whether another party requires you to keep them longer, and it names insurers and creditors as examples.
| Situation | What to do |
|---|---|
| You bought equipment or other property | Keep the payment records until the limitations period ends for the year you dispose of it. |
| A lender or insurer requires records | Follow the longer period in your agreement. |
| You are in an audit, dispute or lawsuit | Keep everything related until it is fully resolved. |
| You are unsure which period applies | Ask your accountant before you shred anything. |
| Your state or industry has its own rules | Confirm the requirement with your accountant or the relevant agency. |
How do you dispose of old check records safely?
Old checks and statements still show your business name, address, routing number and account number, so do not toss them in the recycling bin. Shred paper records, and delete electronic copies from every device and backup once the period ends. Keep a short destruction log with the date and the years covered. Our article on check washing explains why account details on a check are worth protecting.
What should you do next?
- Ask your accountant which retention period applies to your business.
- Sort your check records by tax year and check number.
- Decide whether to scan, and write down how the system will work.
- Download bank statements and check images regularly, not only when you need them.
- Mark your calendar with the date each year of records can be reviewed for disposal.
If you need new checks with clear numbering, contact us and we will help you choose the right format.
Why businesses order checks from Checks Next Day
Printed with your bank details. You enter your routing number, account number, starting check number, and business name and address when you order.
Same-day production on weekday orders. Orders placed before 2:00 PM Eastern, Monday through Friday (excluding holidays), are produced and shipped the same business day for next-day arrival, as long as the details are complete and verified.
Formats that match how you work. Choose computer checks, manual business checks or blank check stock to suit your software and workflow.
Faster reorders. Reorders usually move faster because artwork and specifications are already on file.
About the Author
The Checks Next Day team writes about business checks, check printing and check safety for small businesses.
You deposited a customer check on Monday and need to pay a supplier on Wednesday. The balance looks right, but the bank says the check has not cleared. What you can spend, and when, depends on rules most owners never read.
This guide explains how long it takes for a check to clear for a business account. You will see the federal timeline, why some deposits are held, whether a check can still bounce after the money shows up, and how to plan your cash flow around the delay.
Quick Summary
Most checks must be available by the second business day after you deposit them, but a check is not truly final just because the money is available. Cash, electronic payments, cashier's checks and the first $275 of check deposits are due the next business day, while new accounts, large deposits and doubtful checks can be held longer.
- Business days decide the clock. Saturdays, Sundays and federal holidays do not count, and a deposit made after the bank's cutoff counts as made the next business day.
- Most checks take up to two business days. That is the federal limit for funds availability, and many banks release funds sooner.
- Some deposits are held longer. New accounts, daily check deposits over $6,725, repeated overdrafts and doubtful checks can all trigger a longer hold.
- Available is not the same as final. A check can still be returned unpaid after you can spend the money, and the bank can take it back.
- Checks you write clear on the payee's schedule. The date your account is debited depends on when the payee deposits the check, not on when you mailed it.
- Planning beats waiting. Track deposits and outstanding checks, keep a buffer, and ask your bank for its funds availability policy in writing.
| Question | Short answer |
|---|---|
| How long does a normal check take? | Funds are due by the second business day, and often sooner. |
| What is available the next business day? | Cash deposited in person, electronic payments, the first $275 of checks, and cashier's, certified and teller's checks deposited in person. |
| Do weekends and holidays count? | No. They are not business days. |
| Why might a check be held longer? | A new account, a large deposit, repeated overdrafts, a doubtful check, a redeposit, or an emergency. |
| Can a check bounce after funds are available? | Yes. The bank can recover the money if the check is returned unpaid. |
| When does a check I wrote clear? | When the payee deposits it and the check reaches your bank, which can take days or weeks. |
What does it mean when a check clears?
A check clears when the bank that holds the account it was written on, called the paying bank, has paid it and the money has moved to the bank where it was deposited. Clearing is the behind-the-scenes process that turns a paper or electronic check into real money.
People use the word loosely, so it helps to separate three moments that often get mixed up:
| Milestone | What it means | What you can do |
|---|---|---|
| Deposited | The bank has received the check and shows it in your account, often as pending. | Usually nothing yet. The money may not be spendable. |
| Funds available | The bank has released the money for you to spend or withdraw. | You can use the funds, but the check can still be returned. |
| Paid and final | The paying bank has finally paid the check and the time to return it has passed. | The money is safe. This is the true meaning of cleared. |
Federal rules control only the second milestone, how long a bank can wait before you can use deposited funds. They do not promise that the third milestone has happened. That gap is where most business surprises come from.
Is a cleared check the same as a canceled check?
No. A canceled check is a check that has been paid and is kept as proof of payment, either as the returned paper check or as an image on your statement. Clearing is the process that happens before that. Our guide to the voided check explains how a voided check differs from both.
How long does it take for a check to clear?
Under federal funds availability rules, most checks must be available by the second business day after the deposit. Several types of deposits must be available the next business day, and a few take longer. These are legal limits, so your bank may release funds sooner but cannot normally make you wait longer without a reason.
| Type of deposit | Funds due by | Notes |
|---|---|---|
| Cash deposited in person | Next business day | Cash not deposited in person is due by the second business day. |
| Electronic payments such as ACH and wires | Next business day | Counted once the bank has the funds and the account details. |
| First $275 of check deposits | Next business day | Applies to total checks deposited on one banking day. |
| Cashier's, certified and teller's checks | Next business day | Deposited in person, and the bank may ask for a special deposit slip. |
| Check drawn on the same bank | Next business day | Deposited at a branch in the same state or check processing region. |
| Most other checks | Second business day | This covers many business and personal checks. |
| Deposits at another bank's ATM | Fifth business day | Applies to ATMs not owned by your bank. |
These categories come from Regulation CC, the federal rule that sets deposit availability. You can read the current text of the next-day availability rule on the government's regulations site. The dollar amounts were raised on July 1, 2025, and older articles still quote $225 and $5,525.
Do checks clear on weekends and holidays?
Banks count business days, and Saturdays, Sundays and federal holidays are not business days. A check deposited on Saturday is generally treated as deposited on the next business day, so the clock starts on Monday.
What is the deposit cutoff time, and why does it matter?
A cutoff time is the hour after which a bank counts your deposit as made the next business day. Federal rules do not let a bank set it earlier than 2:00 p.m. at a branch or noon at an ATM or other off-site location, and your bank may set it later. If you deposit at 4:00 p.m., the check may be counted as received tomorrow.
| You deposit | Bank counts it as | Funds due by (second business day) |
|---|---|---|
| Monday before the cutoff | Monday | Wednesday |
| Monday after the cutoff | Tuesday | Thursday |
| Thursday before the cutoff | Thursday | Monday |
| Friday before the cutoff | Friday | Tuesday |
| Friday after the cutoff, Saturday or Sunday | Monday | Wednesday |
Add one business day for every federal holiday that falls in the window. Use this table as a planning tool, and ask your bank for its own cutoff times and funds availability disclosure.
How long does a mobile check deposit take?
The Consumer Financial Protection Bureau notes that a check deposited by photo through mobile banking may follow a different timetable, so ask your bank, and ask about its cutoff time for app deposits. If you take payments by check often, our guides to how to endorse a check and how to fill out a business deposit slip cover the details that cause deposits to be rejected or delayed.
How does a check clear step by step?
Clearing follows the same basic path whether the check is paper or an image. The details differ between banks, but the sequence is consistent:
- The payee deposits the check. The depositing bank records it and usually shows a pending item.
- The check is sent for payment. Banks exchange checks as electronic images today, and some paper still moves through the system.
- The paying bank checks it. It looks at the signature, the account status, the balance and any stop payment order.
- The paying bank pays or returns it. If it pays, the money moves to the depositing bank. If not, the check is returned unpaid.
- The deposit becomes final. Once the paying bank has paid and the return window has closed, the check has fully cleared.
The routing and account numbers printed in the MICR line at the bottom of the check tell the system where to send it. Our guide to the MICR line on a check explains each number.
What is the midnight deadline for a returned check?
Under the Uniform Commercial Code, a paying bank that has settled for a check can still reverse that settlement if it returns the item or sends notice before it has made final payment and before its midnight deadline. The practical lesson is that a check can come back after the deposit shows as received.
Why is my business check taking longer to clear?
A bank can hold a deposit longer than the standard schedule in specific situations. The most common ones are listed below, based on the exceptions in Regulation CC section 229.13.
| Reason for the hold | What the federal rule says | What it means for a business |
|---|---|---|
| New account | An account is new for its first 30 calendar days. Check deposits above $6,725 per banking day can be held until the ninth business day. | A new business account may wait longer for large customer checks. |
| Large deposit | Check deposits totaling more than $6,725 on one banking day can be delayed. | A big payment from one customer can be held even on an older account. |
| Repeated overdrafts | Six or more negative days in six months, or two days negative by $6,725 or more, can trigger it for six months. | Overdrafts today can slow every deposit for months. |
| Doubt the check will be paid | The bank needs facts that would convince a reasonable person, and must state the reason in the notice. | Ask the bank what the reason is and request it in writing. |
| Redeposited check | Checks returned unpaid and deposited again are exempt from the standard schedules. | A returned customer check can take longer the second time. |
| Emergency conditions | Interrupted communications, equipment failure or other emergencies can delay availability. | Rare, but it can affect a deposit during outages or disasters. |
For most checks, a hold of up to five business days beyond the normal schedule is presumed reasonable, which puts the longest ordinary hold around the seventh business day. A longer hold is possible, but the bank has to justify it. The rules and thresholds are in the exceptions section of Regulation CC.
Does the bank have to tell me about a hold?
Yes. When a bank holds a deposit longer than usual, it must give you a notice with the reason and the date the funds will be available. If the bank delays a check because it doubts it will be paid and does not give written notice at the time of deposit, it generally cannot charge overdraft or returned-item fees caused by the delay.
Can a check bounce even after the money is in my account?
Yes. Federal rules set when you can use deposited funds, not whether the check will be paid. If a check comes back unpaid, the bank where you deposited it can generally reverse the credit or recover money you already withdrew, as the revocable settlement rules in UCC section 4-301 describe, and your account agreement will say the same.
Treat funds availability as permission to use the money, not as a guarantee. For more on the risks of timing games with deposits, read our article on check kiting fraud.
How long does it take for a check you write to clear your account?
The date a check you wrote clears depends mostly on the payee. Your bank cannot pay a check it has not received, so the clock starts when the payee deposits it, not when you write or mail it.
| Factor | How it affects timing | What you can do |
|---|---|---|
| Mail time | A mailed check can take several days to arrive. | Mail early and track important payments. |
| When the payee deposits | Some payees deposit the same day, others wait weeks. | Do not assume a check has cleared because time has passed. |
| How the payee deposits | In person, mobile and ATM deposits follow different cutoffs. | Expect more variation for payments to small vendors. |
| Your bank's posting | The check reaches your bank, which pays it against your available balance. | Keep enough funds in the account until it posts. |
| The six month window | An ordinary check is generally stale after six months, but a bank may still pay it. | Follow up on very old outstanding checks. |
Because the timing is out of your hands, a good record is the best control. Mark each check as outstanding in your check register until it appears on a bank statement, and read our guide on how long a business check is good for for stale dating.
What if a check you wrote never clears?
Contact the payee first, because the most common reason is that the check was never deposited. If it was lost, follow the steps in our guide to how to stop payment on a check, then issue a replacement under a new check number so the two never get confused.
How long does a payroll check take to clear?
Payroll checks clear on the same schedule as any other check, so the money leaves your account when each employee deposits or cashes theirs. Keep the full payroll in the account for several days after the pay date. Our guides to making payroll checks and whether payroll checks can bounce cover the risks.
How should a business plan cash flow around check clearing times?
Plan around the later of two dates: when funds are available and when the check is truly final. For routine, familiar customers, the first date is usually enough. For large or unfamiliar payments, the second matters too.
- Know your bank's disclosure. Ask for the funds availability policy and the cutoff times in writing.
- Deposit early in the day and early in the week. That puts the clock ahead of weekends and holidays.
- Track deposits as uncollected. Record them in your register but do not treat them as spendable until available.
- Watch the available balance, not the ledger balance. The available balance is what you can use today.
- Keep a buffer for outstanding checks. Checks you wrote can post at any time.
- Handle large payments differently. Ask customers to pay large invoices by an electronic method or with a cashier's check.
Are there faster ways to receive a business payment than a check?
Yes. Under the federal schedule, electronic payments and cashier's, certified and teller's checks deposited in person must be available the next business day, while most ordinary checks take up to two. If speed matters, ask the payer which method they can use and compare it with your bank's own policy.
What should you do when a deposit is held?
- Ask the bank for the hold notice, the reason, and the exact date the funds will be available.
- Check which rule applies: a new account, a large deposit, overdraft history or doubt about the check.
- Contact the payer if the bank doubts the check, and confirm that it is good.
- Move other payments if needed so you do not overdraw while you wait.
- Record the date and the bank's answer in your files for future reference.
What helps your checks clear without problems?
You cannot control the payee's bank, but you can remove avoidable causes of delay on your own checks. Three habits matter most:
- Accurate bank details on the check. The routing and account numbers in the MICR line must match the account. Our guide to the MICR line shows where each number sits.
- Clear, consistent numbering. Sequential check numbers make it easy to match items to your bank statement. Our guide to ordering business checks for the first time explains how to set the starting number.
- Good records. Mark each item outstanding until it clears, and reconcile every month.
When you need a new supply, choose computer checks for printing from software or manual business checks for writing by hand. Orders placed before 2:00 PM Eastern on a business day are produced the same day for next-day arrival when the details are complete, as explained on our same-day production page.
What should you do next?
- Find your bank's funds availability disclosure and note the cutoff times.
- Use the timeline table above to plan your next large deposit.
- Add an outstanding column to your register for checks you have written.
- Review how you take large payments, and consider an electronic or official-check option.
If you need help choosing a check format, contact us and we will point you to the right one.
Why businesses order checks from Checks Next Day
Printed with your bank details. You enter your routing number, account number, starting check number, and business name and address when you order.
Same-day production on weekday orders. Orders placed before 2:00 PM Eastern, Monday through Friday (excluding holidays), are produced and shipped the same business day for next-day arrival, as long as the details are complete and verified.
Formats that match how you work. Choose computer checks, manual business checks or blank check stock to suit your software and workflow.
Faster reorders. Reorders usually move faster because artwork and specifications are already on file.
About the Author
The Checks Next Day team writes about business checks, check printing and check safety for small businesses.
Look along the bottom edge of any check and you will see a strip of odd-looking numbers. That strip is the MICR line. It tells banks which institution must pay the check, which account to debit and which check in the sequence this is. This guide shows you how to read it, what each symbol means and what goes wrong when it is printed badly.
Quick Summary
The MICR line on a check is the strip of coded digits and symbols along its bottom edge, printed in magnetic ink. It carries the routing number of the bank, your account number and the number of the check, in a font that bank equipment can read by machine. On most business-size checks, you read the check number first, then the routing number, then the account number.
- Three data points: a nine-digit routing number for the bank, an account number and a check number.
- Four symbols: transit, on-us, amount and dash symbols mark where each field starts and ends.
- Magnetic ink: Federal Reserve guidance says only the MICR line has to be printed in magnetic ink, not the whole check.
- Clear band: the bottom 5/8 inch of the check is reserved for MICR, so signatures and stamps belong above it.
- Different order by check size: personal-size checks read routing, account, check number, while business-size checks usually start with the check number.
- Verify before you send: one wrong digit or a smudged line can push a check into manual handling.
Here is the MICR line broken down by part, using a business-size check as the model.
| Part of the line | What it tells the bank | Where to find it |
|---|---|---|
| Check number | Which check in the sequence this is | Far left, between two on-us symbols |
| Routing number | Which bank must pay the check | Nine digits between two transit symbols |
| Account number | Which account to debit | Right of the routing number, ending with an on-us symbol |
| Amount | The dollar value, once encoded | Far right, usually blank until the bank adds it |
Sources: Federal Reserve Board, Check 21 FAQ; American Bankers Association, routing number page.
If you would rather not encode the line yourself, our business checks arrive with the details printed, and we offer same day production with next day delivery.
What this guide covers
- What the MICR line is
- Where the MICR line sits on a check
- How to read it number by number
- What the four symbols mean
- How the line is laid out by position
- Why magnetic ink is required
- What happens when the line is wrong
- How to judge a MICR line on a check you receive
- What to have ready when you order checks
What is the MICR line on a check and what does it hold?
The MICR line is the band of coded numbers and symbols printed near the foot of a check in magnetic ink. The name is short for magnetic ink character recognition.
U.S. law describes the line as numbers that may cover the bank routing number, the account, the check serial and the amount, printed in magnetic ink under generally applicable industry standards. Cornell Legal Information Institute, 12 USC 5002.
The characters use a font called E-13B, which has ten numerals and four special symbols.
The American National Standards Institute publishes the print specification, ANSI X9.100-20, along with separate standards for placement and for MICR paper. ANSI Blog, MICR specifications. The font was shown to the American Bankers Association in 1956 and adopted by it in 1958. Wikipedia, Magnetic ink character recognition.
Why do banks still use the MICR line when most checks are scanned?
Banks still use the MICR line because the data travels with the check, even when the check becomes an image. The Federal Reserve notes that electronic collection is now the primary way checks are collected. Federal Reserve Board, Check Services.
When a bank prints a paper copy from an image, called a substitute check, that copy must carry a MICR line with all the information from the original's line. Cornell Legal Information Institute, 12 USC 5002. So the numbers you print or order are used at every step, from the first deposit to the final debit.
Where is the MICR line on a check?
The MICR line runs along the bottom edge on the front of the check, inside a strip called the clear band. The clear band is at least 5/8 inch high, measured from the bottom edge, and nothing except MICR characters should sit in it. The base of the characters starts about 3/16 inch above the bottom edge. Bank check printing specification (M&T Bank requirements).
On a check-on-bottom layout, the line sits at the foot of the page. On a check-on-top layout, it sits at the bottom of the check portion, with the voucher or stub area below it. In every layout, the line belongs to the check itself, not to the page. Our guide to check on top, middle or bottom explains how the layouts differ.
Because the clear band is reserved, a signature that dips too low, a stamp or a decorative border can interfere with the line.
Government and bank specifications are blunt about it. One state treasurer's handbook says no printing belongs in the lower 5/8 inch band, which is reserved for MICR. North Carolina State Treasurer, banking handbook.
A bank specification also says facsimile signatures cannot extend into the clear band. Bank check printing specification (M&T Bank requirements). Keep your signature on the signature line and your memo text above the strip.
How do you read the MICR line number by number?
Read the MICR line from left to right. On a personal-size check, the order is routing, account, then check number. American Bankers Association, routing number page.
On most business-size checks, the check number moves to the far left, in an extra field called the auxiliary on-us field. You then read check number, routing number and account number.
Here is an invented sample line for a business-size check. The numbers are for illustration only and do not belong to any real bank or account.
| Segment | Example | What it is |
|---|---|---|
| 1 | ⑈001042⑈ | Check number 1042, between on-us symbols |
| 2 | ⑆123456780⑆ | Routing number, between transit symbols |
| 3 | 4501223388⑈ | Account number, ending with an on-us symbol |
Use this quick routine on any check in front of you:
- Find the strip. Look at the bottom edge for the row of blocky numbers and symbols.
- Find the two transit symbols. The nine digits between them are the routing number.
- Test the routing number. Run the check digit test in the next section.
- Read the account number. It runs from the routing number to the next on-us symbol.
- Match the check number. Match it against the number printed on the face of the check, usually near the top right.
What is the routing number in the MICR line?
The routing number is the nine-digit code between two transit symbols that identifies the bank that must pay the check. The first four digits are the Federal Reserve routing symbol, the next four identify the institution, and the ninth is a check digit. Wikipedia, Routing transit number.
The first two digits point to the Federal Reserve district. Thrift and credit union numbers start with a 2 in districts 1 to 9 and a 3 in districts 10 to 12. Federal Reserve Financial Services, key to check routing numbers. That is why most routing numbers begin with 0, 1, 2 or 3.
How does the routing number check digit work?
The last digit of a routing number is calculated from the first eight, so a typing slip is easy to catch. Multiply the digits by 3, 7 and 1 in a repeating pattern, add the results, and the total must be a multiple of 10. Wikipedia, Routing transit number.
| Number tested | Weighted total | Result |
|---|---|---|
| 123456780 (sample) | 36 + 105 + 9 = 150 | Passes, 150 is a multiple of 10 |
| 123546780 (4th and 5th digits swapped) | 39 + 98 + 9 = 146 | Fails, 146 is not a multiple of 10 |
Source: the 3-7-1 formula is described on Wikipedia, Routing transit number. Worked examples use invented numbers.
The test is a typo filter, not proof. It can miss some swaps, such as two digits that differ by five, and a number that passes is not guaranteed to belong to your bank. Confirm the number against a check or a document from your bank.
What is the account number in the MICR line?
The account number identifies your specific account, and it follows the routing number, ending with an on-us symbol. Its length is set by your bank, so do not assume it matches another bank's format. Copy it digit by digit from an existing check or your bank's paperwork, never from memory.
Where is the check number in the MICR line, and why must it match?
The check number is the sequence number for each check, and the number in the MICR line should match the number printed on the face of the check. One bank's printing specification requires an identical serial number in both places, preferably in the upper right corner. Bank check printing specification (M&T Bank requirements).
A mismatch makes reconciliation harder, because your records and the bank statement tell different stories. A clean check register that follows the printed number helps you spot a gap or a duplicate quickly.
Is the routing number on a check the same as the ACH or wire routing number?
Not always. Larger banks may use different routing numbers by state, by region or by type of transaction, so the number on your checks may not be the one your bank lists for direct deposit or wires. Bankrate, routing number guide. Ask your bank which number to use for each purpose.
Deposit slips carry their own MICR line, so a number that looks unfamiliar there is worth a question to your bank. Our guide on how to fill out a business deposit slip explains why you should not print your own.
What do the four MICR symbols mean?
The E-13B font has four symbols called transit, on-us, amount and dash. Together they mark where each field starts and ends. Industry insiders sometimes call the line the TOAD line, after the first letters of the four names. Wikipedia, Magnetic ink character recognition.
| Symbol | Name | What it marks |
|---|---|---|
| ⑆ | Transit | Opens and closes the bank routing number |
| ⑈ | On-us | Sets off the account number and, on business checks, the check number |
| ⑇ | Amount | Brackets the check amount, added by the bank |
| ⑉ | Dash | Separates parts of a number, such as within an account number |
Source: Wikipedia, Magnetic ink character recognition. The symbols on screen are Unicode look-alikes, while real checks use the MICR font.
How is the MICR line laid out by position?
The MICR line is laid out in fixed positions that are counted from the right edge of the check. The amount field sits at the far right, then the on-us field, then the transit field, then an optional one-digit code, and finally the auxiliary on-us field on larger checks. The map below shows the standard layout.
| Position from right edge | Field | Usually holds |
|---|---|---|
| 1 to 12 | Amount | Left blank by the printer, added by the bank later |
| 13 to 32 | On-us | Account number |
| 33 to 43 | Transit | Nine-digit routing number between two transit symbols |
| 44 | External processing code (optional) | One digit for special handling, usually blank |
| 45 and up | Auxiliary on-us | Check number on business-size checks |
Sources: Morovia, MICR line placement guide; Bank check printing specification (M&T Bank requirements); ANSI Blog, MICR specifications; North Carolina State Treasurer, banking handbook.
The external processing code is a single optional digit placed to the left of the routing field. ANSI notes that ASC X9 controls how it is assigned. Individual banks also publish their own MICR specification sheets that follow the standard, so when you set up checks for a new account, use your bank's sheet if it gives you one.
Position matters most when you print your own line. A line that is shifted or scaled can be misread, which is why you should print at actual size and never use a fit-to-page setting.
Why must the MICR line use magnetic ink?
Bank sorting equipment relies on the magnetic signal of the line. The Federal Reserve says industry standards have required magnetic ink for the MICR line on original checks for a long time, and that only the line itself needs it. The date, payee name and amount can use regular ink. Federal Reserve Board, Check 21 FAQ.
That has a practical meaning. If your check stock already has the MICR line pre-printed, the rest of the check does not need magnetic ink. If you have to print the line yourself, the Federal Reserve says to print it in magnetic ink.
Can you print your own MICR line?
Yes. You need blank check stock, check printing software that can create the line, a laser printer and MICR toner. Our guides to blank check stock and computer checks software explain each piece and how to match the layout to your software.
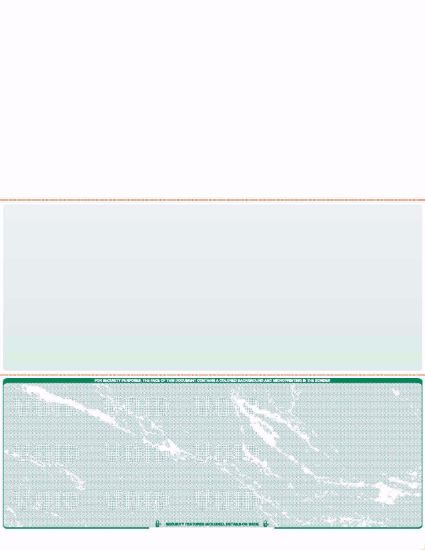
Some businesses prefer checks that arrive with the line already encoded. Our types of business checks guide helps you decide which route fits your payment volume and software.
Will a bank reject a check printed with regular toner?
It can, and you should not count on it working. You may see people online say that regular toner has worked for them for years. That can happen because most checks are now collected electronically, but the standards still call for magnetic ink, and a bank can still process the paper item.
Policies differ by bank, and problems often show up after the payment has already gone out. The safe approach is simple: use MICR toner, ask your bank if it has a specification sheet, and deposit one test check before printing a full batch.
What happens when the MICR line is wrong, smudged or blocked?
A bad MICR line does not make a check illegal. It makes the check hard for a machine to read, and that is where delays start. The table below links common problems to the likely cause and the fix.
| Problem | Likely cause | What to do |
|---|---|---|
| Wrong routing or account digit | Typing error when setting up software or ordering | Run the check digit test, compare with a known good check, and reprint |
| Faint or smeared characters | Weak toner or stock that does not suit your printer | Use true MICR toner and stock made for laser printing, then test again |
| Characters in the wrong place | Scaling, tray misfeed or a layout that does not match the stock | Print at 100 percent, load paper straight, and recheck the layout |
| Marks in the clear band | Signature, stamp, label or border that dips into the strip | Keep everything except MICR characters out of the bottom 5/8 inch |
| Check number mismatch | Software numbering differs from the printed number | Align both numbers before you print the next batch |
| Line not read as magnetic | Regular toner or ink used for the MICR line | Switch to MICR toner and reprint the affected checks |
What does "MICR line has an intruder" mean on a mobile deposit?
Some deposit apps show a message about an intruder in the MICR line. It generally points to a stray mark or character in the strip that the software cannot read as part of the line. Retake the photo on a flat, dark surface with the whole bottom edge in frame. If the message keeps appearing, ask the issuer for a replacement or deposit the check at a branch.
How can you judge a MICR line on a check you receive?
Compare the line with the rest of the check, then confirm anything that looks off with the bank. No single sign proves a check is good or bad, and a bank can verify far more than you can by eye. Use this short list as a first pass:
- Bank match: the routing number should fit the bank named on the check, and it should pass the check digit test.
- Number match: the check number in the MICR line should match the number printed in the upper right corner.
- Range: a serial number that is far lower than the issuer's current checks deserves a second look.
- Print quality: the Federal Reserve's check fraud toolkit lists MICR characters that look raised or glossy among the indicators of a counterfeit check.
- Stock and alignment: the toolkit also lists stock or alignment that differs from known legitimate checks.
Source: FedPayments Improvement, Types of Fraudulent Checks.
For payments that matter, ask your bank to verify the item before you act on the funds. To make your own checks harder to copy, read our guides to high security business checks and blank check security features.
What should you have ready to get the MICR line right when ordering checks?
Gather the details from your bank's own documents or an existing check before you order. A single wrong digit is the most common reason a new batch needs to be redone. Use this list:
- A reference check: a voided check from the same account shows the line the way your bank expects it. Our guide to what a voided check is explains how to void one safely.
- The check routing number: use the number on your checks, not a number copied from an online transfer screen without confirming it.
- The account number: read it digit by digit and have a second person confirm it.
- Your starting check number: continue from your last check so your register stays in order. Our guide to ordering business checks for the first time covers numbering and setup.
- Your software: match the format to your accounting program. See which computer checks work with QuickBooks, Quicken and Sage 50.
When your checks arrive, compare the first one with a known good check, line by line, before you use the box.
Related reading on checks and check security
- Computer checks for businesses that print from accounting software.
- Payroll checks for teams that pay by check.
- Check washing for a clear look at how altered checks happen and who pays.
What should you do next?
Check the MICR line on the checks you use today. Read it left to right, run the check digit test, and confirm the check number matches the upper right corner. If your checks are printed in house and anything looks faint, shifted or crowded, fix that first.
If you would rather have the line encoded for you, browse our business checks or blank checks. We handle same day production with same day production and next day delivery.
About the Author
The Checks Next Day team prints and ships business and personal checks for U.S. customers every business day, with same day production and next day delivery. Bank policies, deposit agreements and equipment vary, so confirm specifics with your own bank.
Check washing turns a payment you already approved into a withdrawal you never authorized, and you normally find out weeks later on a statement. The difficult part is not understanding the trick. It is knowing who absorbs the loss, how fast you have to act, and which controls are worth paying for.
Quick Summary
Check washing is check fraud. A thief steals a signed check from the mail, uses solvents such as acetone or bleach to lift off the payee and the amount, then rewrites both and deposits it. Your signature is genuine, which is exactly why the altered check clears.
- It is an altered genuine check, not a counterfeit. The account details and the signature are real, so the item passes the front line checks that catch fakes.
- Business accounts are the preferred target. Michigan's Attorney General, citing federal analysis, notes a stolen business check is worth more to a thief because a company account tends to hold a larger balance and gets looked at less frequently.
- Your bank can usually charge only the original amount. Under UCC 4-401, a bank that in good faith pays an altered item may charge the account according to the original terms of that item.
- Deadlines decide the outcome more than the fraud does. UCC 4-406 sets a reasonable period not exceeding 30 days to examine a statement and notify the bank, and a one year outside limit after which you cannot assert the alteration at all.
- Reconciliation catches washing, inspection does not. You never hold the washed check, so the only place it surfaces is your statement or the check image.
- Prevention runs in one order: stop mailing checks from unsecured points, add Positive Pay, then make the stock harder to wash.
The table below is the short version of liability. Each row is explained in full further down.
| Situation | Who normally bears the loss | Rule that decides it | Your first move |
|---|---|---|---|
| You report inside your statement window | The paying bank, which then pursues the bank that took the deposit | UCC 4-401, UCC 4-406 | Written notice to your bank the same day |
| You report after about 30 days from the statement | Loss can shift to you on that item, and on later items by the same wrongdoer | UCC 4-406(d) | Notify now and record the statement date |
| You report more than one year later | You, with no claim against the bank on that item | UCC 4-406(f) | Review every account for other altered items |
| Your own handling helped the alteration | Split between you and the bank by comparative fault | UCC 3-406 | Fix and document the control that failed |
| A check mailed to you was washed | Your customer's account was debited, so your customer holds the claim | UCC 4-401, UCC 4-406 | Ask for a reissue by a non mail method |
The Uniform Commercial Code is adopted state by state with variations, and your deposit agreement can impose a shorter notice period than the code allows. Treat this page as general information, not legal advice, and confirm the specifics with your bank and your own adviser.
If your current checks are plain stock, moving to high security business checks is the one change you can make today, with same day production and next day delivery.
What this guide covers
- What is check washing?
- How common is check washing right now?
- Who is liable for a washed check?
- What should you do in the first 24 hours?
- What if a check mailed to your business was washed?
- How do you stop check washing before it starts?
- How often should you reconcile to catch it in time?
- Is check washing a federal crime?
What is check washing?
Check washing is a type of check fraud. Someone lifts a check or a money order out of the mail, applies a chemical such as bleach or acetone, and rewrites who gets paid and how much. That is the definition used by the Office of the Comptroller of the Currency on its HelpWithMyBank.gov guidance for national bank customers.
The word washing is literal. The paper goes into a solvent and comes out with the handwriting gone.
How does a check get washed?
The method is low effort and has barely changed in years. The Michigan Attorney General's consumer alert sets out the sequence in plain terms.
- The check is stolen in transit. Mailboxes with the flag up and street collection boxes are the usual sources, a practice often called mailbox fishing.
- The signature is masked. Low adhesive tape goes over the signature line so the one part the thief needs stays intact.
- The paper is soaked. Acetone, paint thinner or bleach dissolves standard ballpoint ink while the printed elements survive.
- It is dried and rewritten. What remains is a signed blank check, which is rewritten or sold on.
- It clears your account. You learn about it when the item appears on your statement, which can be weeks later.
Read that list again as a control problem rather than a crime story. Four of the five steps happen after the check leaves your hands and before your bank tells you anything. Only step one and step five sit anywhere near your reach.
What does a washed check look like?
Usually you never see it. The evidence you get is a cleared item on a statement, or an image in online banking, so that image is where the inspection happens.
- A payee you do not recognize, or your payee's name spelled slightly differently
- An amount larger than your records say, often a round number
- Handwriting that does not match the person who writes your checks
- Faint ghosting where the original writing was lifted but not fully removed
- Mottled or discolored paper, or a background pattern that looks washed out in one area
- A check number out of sequence with your register
That last one is the most useful and the most often skipped. A number that does not match your check register tells you something is wrong before you have to judge handwriting on a low resolution image.
Is a washed check the same as a counterfeit check?
No, and the difference changes which rule applies to your claim.
| Type | What the thief did | Why it matters to you |
|---|---|---|
| Washed or altered check | Changed a real check you signed | Your signature is authentic, so it clears easily. Claims turn on alteration rules and timing |
| Counterfeit check | Printed a fake item using your account details | Often caught on security features or stock quality, and treated as an unauthorized item |
| Forged endorsement | Left your check unchanged and signed the back | Nothing on the front looks wrong, so the payee is the one who reports the payment missing |
Community threads from business owners show all three happening and being described as washing. When you report it, say precisely what changed, because your bank files them differently.
How common is check washing right now?
Mail theft related check fraud is measured in hundreds of millions of dollars over a six month window. FinCEN's Financial Trend Analysis on mail theft related check fraud counted 15,417 Bank Secrecy Act reports filed between 27 February and 31 August 2023, tied to more than $688 million in transactions. Banks filed 13,618 of those reports, which is 88 percent of the total, and 635 separate banks filed at least one.
Scale that against how little of it any one business sees. A single washed check rarely makes the news, so the risk reads as rare until you look at the filings.
The wider picture is in a Federal Reserve Bank of Philadelphia Consumer Compliance Outlook article, which reports that checks remain the payment method most often subjected to payments fraud, with 63 percent of survey respondents reporting attempted or actual check fraud in 2024. The same article records 38,500 USPS mail theft incidents involving mail receptacles between October 2021 and October 2022, more than 25,000 in the first half of fiscal 2023, and check fraud suspicious activity reports nearly doubling between 2021 and 2023.
Why are business checks worth more to a thief than personal checks?
Three reasons, and all three are about the account rather than the paper.
- The balance is bigger. A business account can absorb a four figure item without bouncing it, so a larger rewrite succeeds.
- Nobody is watching daily. Michigan's alert, citing federal analysis, makes the same point: a company account gets reviewed less frequently than a household one.
- Volume hides the item. A business that issues sixty checks a month will not notice one unfamiliar payee the way a household would.
Who is liable for a washed check?
The starting position is better than most business owners expect. Under UCC 4-401, a bank that in good faith pays an altered item may charge the account according to the original terms of the altered item. In practice that means the bank can hold you to the check you actually wrote, and the inflated difference is not properly chargeable to you.
Then timing and your own conduct can take that protection away.
How long do you have to report a washed check?
Report it the day you find it. UCC 4-406 requires a bank to make statement information available in enough detail to identify the items paid, and then puts a duty on you to examine it.
- A reasonable period, not exceeding 30 days. Section 4-406(d) refers to the customer having been afforded a reasonable period, not exceeding 30 days, to examine the item or statement and notify the bank. Miss it and the bank can assert the loss against you on that item, and on further items by the same wrongdoer paid before you gave notice.
- One year, and then nothing. Section 4-406(f) is blunt. Without regard to the care of either side, a customer who does not report an alteration within one year after the statement or items were made available is precluded from asserting it.
- Your agreement may be tighter. Deposit agreements commonly shorten the notice period. The code is the ceiling, not the promise.
The practical consequence is a cadence problem, not a legal one. If you reconcile quarterly, you can be inside the one year limit and still outside the window that matters.
What happens if your own handling helped the alteration?
Then the loss gets shared. UCC 3-406 says a person whose failure to exercise ordinary care substantially contributes to an alteration is precluded from asserting it against someone who paid in good faith. If the bank also failed to exercise ordinary care, the loss is allocated between both sides according to how much each failure contributed.
Comparative fault is why the boring controls earn their keep. Signed blank checks left in a drawer, no reconciliation, an unlocked box of stock: each one is an argument the other side gets to make.
A written check signing policy is the cheapest evidence that ordinary care existed, and it matters more once a claim is contested than it ever does on a normal day.
Does the bank refund the whole amount or just the difference?
Normally the difference, because the original check was one you authorized, and UCC 4-401 lets the bank charge you on the original terms. If you wrote $400 and the washed item cleared at $4,000, the $400 payment was genuine and the $3,600 was not.
Two situations change that. If the payee was altered as well, your intended supplier never got paid, so you still owe that invoice and will need the full amount restored or the payment reissued. If the signature itself was forged rather than preserved, the item was never authorized at all and the claim covers the whole sum.
What should you do in the first 24 hours after finding a washed check?
Work in this order. The first two steps protect the deadline, and everything after that builds the evidence.
- Give your bank written notice today. A phone call starts it, an email or the bank's dispute form proves it. Keep the timestamp.
- Record the date the statement became available to you. That date, not the date you noticed, is what the 30 day and one year tests run from.
- Ask for an affidavit of forgery or altered item. Banks will not process a claim without it, and the wording is specific to alteration rather than forgery.
- File a police report. Business owners who recovered funds consistently report being asked for the report number before the claim progressed.
- Report the mail theft. Checks taken from the mail are a postal crime, reportable to the U.S. Postal Inspection Service.
- Stop payment on anything still outstanding. If one check from a batch was taken, assume the rest of that envelope is compromised.
- Decide about the account number. A thief who washed one check holds your routing and account numbers. Ask your bank whether a new account number is warranted.
- Tell the intended payee. Their invoice is still unpaid, and they need to know before late fees start.
How do you prove a check was altered?
Your records do the proving, not the paper, because the paper is gone. Build the pack before the bank asks.
| Evidence | What it establishes | Where it comes from |
|---|---|---|
| Check register or accounting entry | The payee and amount you issued | Your books, ideally dated before the clearing date |
| The invoice being paid | Why that amount went to that payee | Supplier invoice or approval record |
| Front and back check images | The alteration and the endorsement used | Online banking, downloaded immediately |
| Payee confirmation of non receipt | The real payee was never paid | A short email from your supplier |
| Mailing details | The check was in the mail stream | Date posted and the drop point used |
| Check number sequence | Which stock is unaccounted for | Your stock log and register |
Download the images the day you find the problem. Access windows for check images are limited and vary by bank, and a claim is much weaker once the image has aged out.
What do you do if your bank denies the claim?
Denials happen, and business owners describe them often. There is a route beyond the first answer.
- Get the denial in writing, with the reason and the rule the bank is relying on.
- Escalate internally past the branch, to the fraud or claims team, and reference the specific code sections rather than the general unfairness.
- Ask about the bank of first deposit. The bank that accepted the altered item carries warranty exposure, and your bank normally pursues it rather than you.
- File a regulator complaint. Complaints can be submitted to the Consumer Financial Protection Bureau, and national bank customers can also contact the OCC's customer assistance group.
- Keep every date. If the dispute turns on whether you gave timely notice, your timeline is the case.
What if a check mailed to your business was washed?
This is the version business owners report most often and the one no general guide covers. A customer mails you a payment, it never arrives, and it clears their account made out to someone else.
Your position is different here, and the difference is worth understanding before you chase anyone.
- Your customer holds the claim. Their account was debited, so their bank is the one with the duty and the deadlines.
- Your invoice is still unpaid. A washed check does not discharge the debt, so keep the receivable open.
- Your job is speed. The sooner the customer reports it, the better their odds, and your payment depends on their claim.
- Ask for a different method. A reissued paper check traveling the same route has the same exposure.
- Watch for the pattern. Repeated interception of payments to the same address points at a route or a receptacle, which makes it a postal report, not a banking one.
If a meaningful share of your incoming payments arrive by mail, the practical fix is a lockbox or an electronic option for your largest accounts, and keeping paper for the rest.
How do you stop check washing before it starts?
Rank the controls by what they actually stop. Most advice lists them flat, which is why businesses buy a pen and skip the control that would have worked.
| Control | What it stops | What it does not stop | Effort |
|---|---|---|---|
| Never mail from an unsecured point | The theft itself, which is the whole supply | Theft inside the postal network | Low |
| Positive Pay | Payment of a mismatched amount or check number | Payee changes, unless payee verification is included | Medium, bank set up |
| Daily or weekly reconciliation | Missing the notice deadline | The fraud occurring | Low, habit |
| Chemically reactive check stock | Clean solvent removal, leaving visible staining | Copying, or forged endorsement | Low, a stock choice |
| Pigment based gel ink | Easy lifting of standard ballpoint ink | Determined solvents, copying, endorsement fraud | Low |
| Separate disbursement account | Exposure of your main balance | The alteration itself | Medium |
| Locked stock and a number log | Internal theft and silent gaps in sequence | Theft after mailing | Low |
Does a gel pen stop check washing?
It raises the effort, it does not remove the risk. Pigment based gel ink bonds into the paper fibers and resists common household solvents better than standard ballpoint ink does.
It is still the weakest control on the list, for one simple reason: it only addresses the washing step. A thief holding your check can photograph it, copy it, or simply endorse the back and deposit it, and none of that cares what pen you used.
Pen choice and the rest of the field by field habits are covered in how to write a business check by hand, so this page does not repeat them.
How does Positive Pay help?
Positive Pay moves detection to before payment instead of after. You send your bank a file of the checks you issued, with number, amount and date, and the bank flags presented items that do not match for you to approve or reject.
Ask one question when you set it up: is payee name verification included? Standard Positive Pay matches the check number and the amount. A washed check very often keeps the amount and changes the payee, which a number and amount match will pass. Payee verification is usually a separate service.
What should you change about how you mail checks?
This is the cheapest meaningful change available, because it attacks the supply rather than the method.
- Hand outgoing checks to a retail clerk rather than leaving them in a receptacle or an unattended tray.
- Never post late in the day, when mail sits in a collection box overnight.
- Keep the envelope anonymous. An envelope that reveals a check inside advertises itself.
- Use a double window self seal envelope sized so the check cannot shift to show the amount through the window.
- Batch less. Twelve checks in one envelope is one theft with twelve losses.
Our business check and envelope size guide has the dimensions if you are matching envelopes to a format.
Where does your check stock come in?
Stock will not stop the theft, and it will not pass a check that your bank's Positive Pay file rejects. What it does is make the washing step fail visibly, so an altered item has a much better chance of being spotted at deposit or on the image.
Chemically reactive paper stains or spots when solvents touch it. Paired with a void pantograph that shows VOID on a copy, and microprinting that blurs when reproduced, the paper itself starts carrying evidence of tampering.
The full feature list lives on one page rather than being repeated here. Blank check security features explains each one and what it defeats, and high security business checks covers which formats carry them. If you print your own, the same features are available on blank check stock, which matters because stock bought as plain paper has none of them.
Check paper in the United States is covered by a published standard, ANSI X9.100-10, Paper Specifications for Checks. It is maintained by the Accredited Standards Committee X9, the body that writes financial services standards for the US. Stock specification is a documented control, not a matter of taste.
How often should you reconcile to catch a washed check in time?
Match the cadence to the notice window, not to your accountant's schedule. The 30 day clock in UCC 4-406 runs from when the statement was made available, so a monthly close that happens three weeks late eats most of the window before anyone opens the file.
| Checks issued per month | Review cadence | What to review |
|---|---|---|
| Under 20 | Weekly | Cleared items against the register, payee and amount |
| 20 to 100 | Twice weekly | Cleared items plus any gap in the check number sequence |
| Over 100 | Daily, through Positive Pay | Exception queue the same day, plus a weekly sequence check |
One habit does more than the cadence itself: have someone who does not write the checks open the statement. Separating preparation from review is the control that catches both outside fraud and the internal kind, and it costs nothing to arrange. Our guide to who signs a business check covers how that separation is usually set up.
Is check washing a federal crime?
Taking checks from the mail is a federal offense, and it is investigated by the U.S. Postal Inspection Service rather than only by local police. Depositing an altered check can bring bank fraud charges as well, and state forgery and theft laws apply too.
None of that changes anything about your own deadlines. Prosecution is slow and is not a recovery route, so file the report and run your bank claim as a separate track.
Related reading on check fraud
Check washing is one method among several, and the defenses overlap.
- Check kiting fraud covers the scheme that targets you when you accept checks rather than write them.
- Personal check safety covers the habits side for checks drawn on a personal account.
- How to write a business check by hand covers closing the gaps that make a rewrite easy.
- What is a voided check covers handling and retaining voids so they cannot be reused.
What to do next
Pick the two controls you do not have yet. For most businesses that is a reconciliation cadence inside the notice window and a conversation with the bank about Positive Pay with payee verification.
Then make the paper work for you. If you are reordering anyway, high security business checks add chemical reactivity, a void pantograph and microprinting at the stock level, and business checks of every format are produced the same day and delivered the next.
About the Author
The Checks Next Day team prints and ships business and personal checks for U.S. customers every business day, with same day production and next day delivery. Questions about security features, washed checks and what to tell a bank come up constantly at order time, and the guidance here reflects those conversations alongside the published banking guidance and code sections named above. Bank policies, deposit agreements and state adoption of the Uniform Commercial Code vary and can change, so confirm specifics with your own bank and adviser.